
How to integrate a local and Azure file server into Workspace 365
As you might know Workspace 365 by New Day At Work is a great SaaS workspace portal (read my introduction here). It allows you to easily manage all your SaaS and remote applications in one place with SSO. But did you know that you can also add local resources to the workspace with a file server and remote apps integration? In this blog, we are going to take a look at the local and Azure file server features and how to implement them.
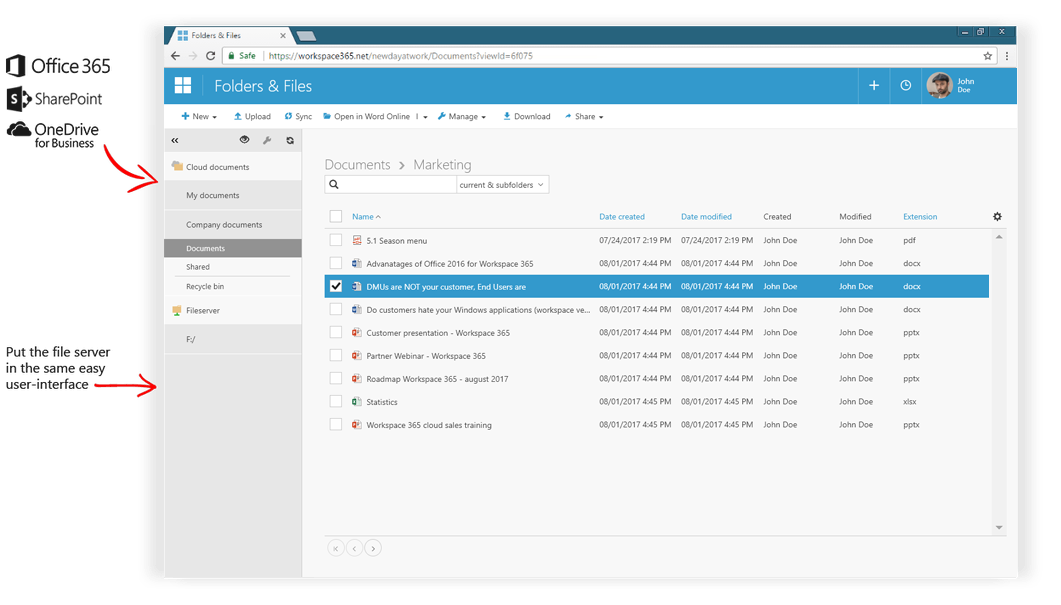
Access to your files in the workspace
Access to your files is, of course, crucial to the work you do. Without data, you can’t run a business. With Workspace 365 you can easily access all your Sharepoint/OneDrive/Teams files in one browser with the same interface. But did you know that you can add your own storage to this browser?
You can use both the online and local Office editors in the file server within Workspace 365, and you are also able to set-up conditional access for the Office online editors when you are outside of the company network. Furthermore, you can enable people to move/copy files between the file server and your Office 365 storage solutions. And while Office 365 pushes you to the online editors, here you have the option to set your preferred editors, which is great for people who are used to the local editors.
Adding File Server Storage to Workspace 365
Connection to local or Azure file servers is done with WebDAV. To make your local file server a WebDAV server we need to do the following steps:
Install the WebDAV windows feature, start PowerShell as an administrator and type in:
Install-WindowsFeature Web-Mgmt-Console
Hit enter, wait for the feature to install and after that type in:
Install-WindowsFeature Web-Server
Hit enter, wait for the feature to install and after that type in:
Install-WindowsFeature Web-DAV-Publishing
Hit enter, wait for the feature to install and after that type in:
Install-WindowsFeature Web-Windows-Auth
Hit enter, wait for the feature to install and after that type in:
Install-WindowsFeature Web-Url-Auth
Hit enter, wait for the feature to install. Now go to the control panel and select Administrative tools. If the above commands are done correctly you should have the IIS manager as a shortcut.

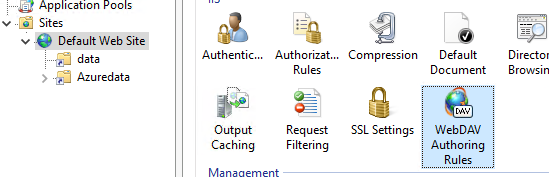
Start the IIS manager, expand the sites folder and then click on Default Web Site. Now click on WebDAV Authoring Rules.
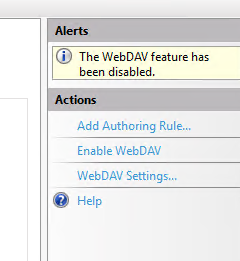
On the right side there will be a warning that WebDAV is disabled. Click on Enable WebDAV in the actions screen below the warning.
Now click on Add Authoring Rule…
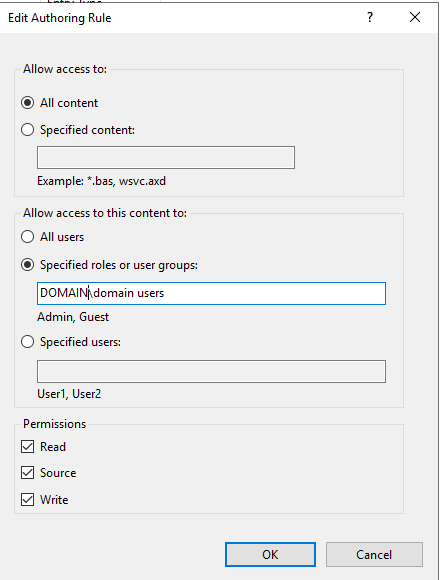
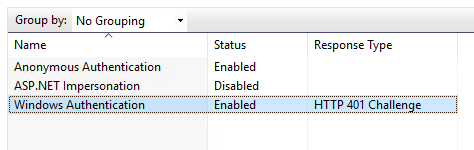
As you can see you can work with security groups from your domain to access the data. Now go back to the default website and select Authentication.
Make sure Windows Authentication is enabled. You can do this by clicking enable in the Actions menu.
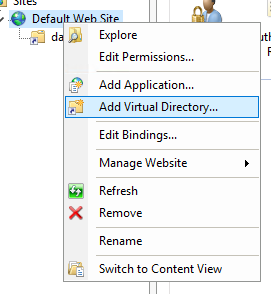
Now we need to add the data we want to access. We do this with Virtual Directories in the default website. Right click on the Default Web Site and click on Add Virtual directory…
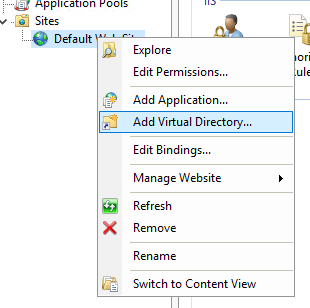
Now enter an alias for your data folder and the UNC path to the local data.
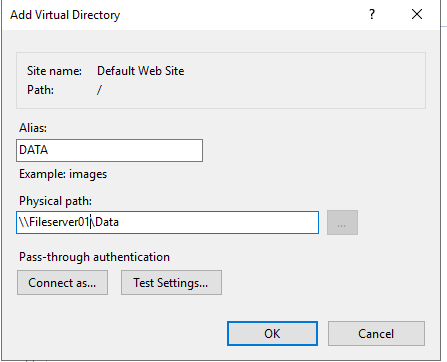
Click on OK. And that’s it. You now have created a WebDAV connection to your data. Now we need to make sure that you can access this WebDAV connection from the internet in a secure manner. So, I would suggest creating a web proxy with SSL. You can do this on most firewalls. If this option is not available, I would suggest creating the WebDAV server in the DMZ and adding an SSL certificate to IIS. More on the security aspect of WebDAV can be found here:
https://support.workspace365.net/hc/en-us/articles/115004168629-Securing-your-WebDav-SSL-fileserver-in-IIS
Adding Azure Storage to Workspace 365
So that’s the local file server but what about Azure Storage? You can also create an Azure Storage Account and link this with WebDAV to the Document app of Workspace 365.
First sign in to Azure, go to https://portal.azure.com Once you signed in click on Create a resource, search for storage account.
Now click on Create and fill in the required information:
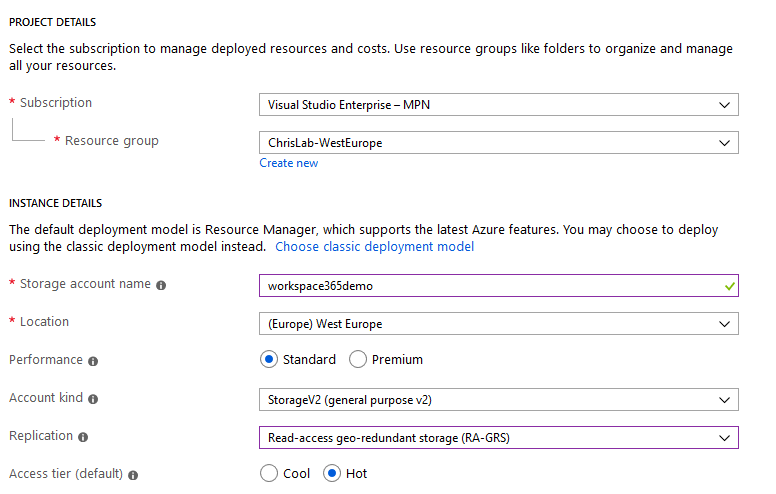
It’s of course up to you to select the right performance and replication. When everything is filled in correctly click on Create. When the resource is done creating click on Go to resource.

(optionally) On the left side click on Configuration. And enable Azure Active Directory authentication for Azure Files (Preview). This does require Azure Active Directory Services. But allows the use of Azure AD credentials.

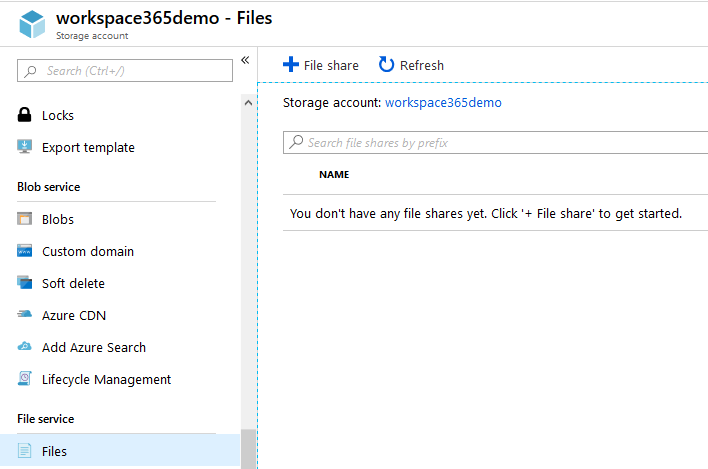
Now we need to create the file share that will store the data. Scroll down to File Service and select files. Click on + File share.
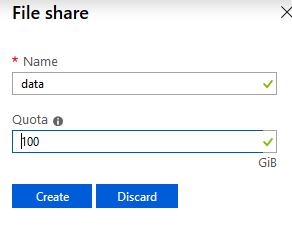
Enter a name for the storage and a quota in gigabytes and then click on Create.
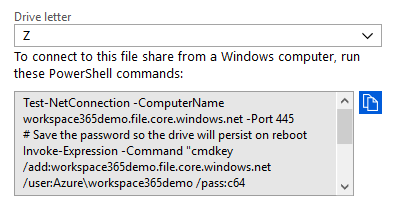
Now we need to get the credentials for this share. Click on the 3 dots (…), add the end of the share and click on connect.

Copy the data from the PowerShell commands window:
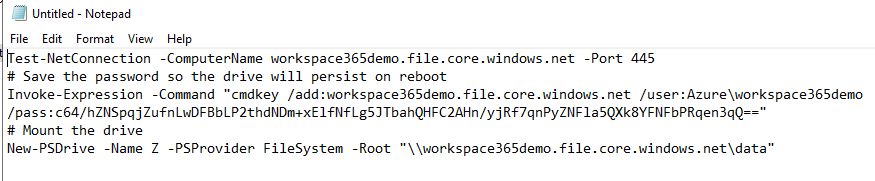
Now we need to go back to our WebDAV server and add this new virtual directory so that we can add it to Workspace 365. On the local server open notepad.exe and paste in the Azure PowerShell script.
Now look for the following information:
/user:
/pass:
And the filesystem -root data
So in my case it is:
User: Azure\workspace365demo
Pass: c64/hZNSpqjZufnLwDFBbLP2thdNDm+xElfNfLg5JTbahQHFC2AHn/yjRf7qnPyZNFla5QXk8YFNFbPRqen3qQ==
Filesystem: \\workspace365demo.file.core.windows.net\data
Now go to the computer manager then Local Users and Groups and click on Users.
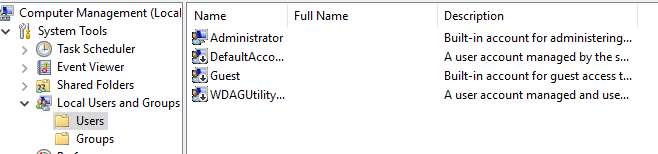
Click on Action and then select New User…

Now we’re going to replicate the storage user locally. In username fill in the Azure username from the notepad but leave out “azure\”. So, in my example it’s workspace365demo. Use the password from the notepad for the user, so in my example: c64/hZNSpqjZufnLwDFBbLP2thdNDm+xElfNfLg5JTbahQHFC2AHn/yjRf7qnPyZNFla5QXk8YFNFbPRqen3qQ== make sure to set the user on Password never expires.
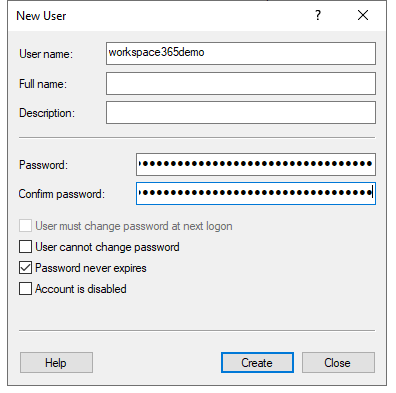
Click on create. Now go back to IIS manager and again right mouse click on Default Web Site and select Add Virtual Directory…
Now enter an Alias, in the physical path enter the filesystem root from the notepad, in my example it is \\workspace365demo.file.core.windows.net\data. Then click on Connect as… and select Specific user: and click on set. Then fill in the new local user so Workspace365demo and the password from Azure.
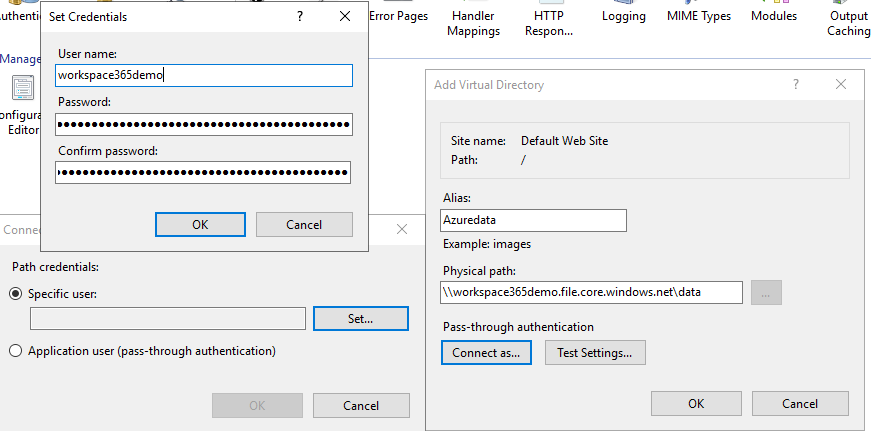
Click on OK twice and click on Test Settings… if everything is correctly configured you should have green signs.

Click on Ok to finish the deployment.
Now the Azure resource is available through a WebDAV connection. In my case the connection is https://FQDN/Azuredata and my local data is available with https://FQDN/data
When your WebDAV connection is available from the internet we need to add it to Workspace 365. Sign in as administrator and click on settings. Then go to fileservers and add a description of the file server and the WebDAV URL. See the GIF below for examples:
For more information see: https://support.workspace365.net/hc/en-us/sections/115001239509-Fileserver-WebDav-SSL
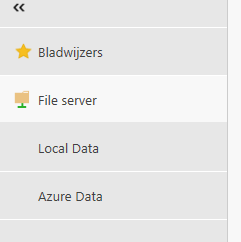
The users can now access this file server with their documents app. This way users can easily use their data from any place in the world through the Workspace 365 portal.
I hope this was informative. For questions or comments you can always give a reaction in the comment section or contact me: