Scripting Citrix XenServer with PowerShell and Command Line
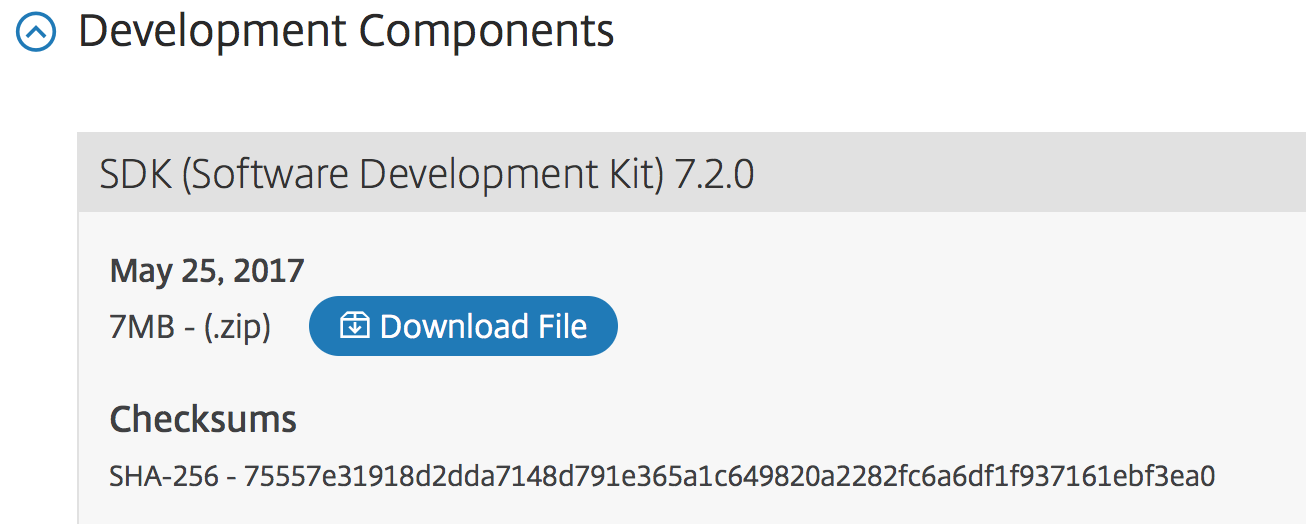
 A few weeks ago I wrote a blog about scripting Citrix PVS. In this blog I will show the most popular commands for Citrix XenServer so that you can use them in your Automation Workflow. Because as always; AUTOMATE EVERYTHING! Citrix XenServer is Linux based so in the command line you can use Linux commands like ls-l or mount. But it also has its own command lines starting with XE. This blog will include those command lines and the PowerShell commands. To get PowerShell working with Citrix XenServer you need to download and install the XenServer SDK from here under the Development Components section

To install the PowerShell SDK you need to copy the PowerShell Module folder from the zip to $env:windir\system32\WindowsPowerShell\v1.0\Modules To enable the module use the following command: Import-Module XenServerPSModule
Jump to command:
- Connect to XenServer
- New VM
- Delete VM
- Change VM Specs
- Add Disk to VM
- Change VM Discription
- Export VM
- Create Snapshot
- Delete Snapshot
- Start VM
- Stop VM
- Reboot VM
- Get VM List
- Get Template List
- Get Snapshot List
Connect to XenServer
PowerShell:
$Xenhost = "YourXenHost"
$Username = "YourUsername"
$Password = "YourPassword"

  Try {
        $Session = Connect-XenServer -Url https://$Xenhost -UserName $username -Password $password -NoWarnCertificates -SetDefaultSession
    } Catch [XenAPI.Failure] {
        [string]$PoolMaster = $_.Exception.ErrorDescription[1]
        Write-Host -ForegroundColor Red "$($Pools.$Pool) is slave, Master was identified as $PoolMaster, trying to connect"
        $Pools.Pool = $PoolMaster
        $Session = Connect-XenServer -url "http://$PoolMaster" -UserName $username -Password $password -NoWarnCertificates -SetDefaultSession
    }
Command line
Open a SSH connection with Putty or use the console tab in XenCenter.
New VM
PowerShell:
$VMname = "VMNAME"
$vCPU = 4
$RAMinGB = 4
$RAMinBytes = $RAMinGB*1073741824

New-XenVM -NameLabel $VMname -VCPUsAtStartup $vCPU -MemoryStaticMin $RAMinBytes -MemoryStaticMax $RAMinBytes -HVMBootPolicy "BIOS Order" -UserVersion 1 -HVMShadowMultiplier 1
From Windows 2016 64Bit Template:
PowerShell:
$VMname = "VMNAME"
$StorageRepositoryName = "Local Storage"

Invoke-XenVM -Name "Windows Server 2016 (64-bit)" -XenAction Clone -NewName $VMname
$newvmspecs = Get-XenVM -name $VMname
$sr = Get-XenSR -Name $StorageRepositoryName
$other_config = $newvmspecs.other_config
$other_config["disks"] = $other_config["disks"].Replace('sr=""', 'sr="{0}"' -f $sr.uuid)

Set-XenVM -Name $VMname -OtherConfig $other_config

Invoke-XenVM -Name $VMname -XenAction Provision
Command Line:
| xe vm-install template=Windows\ Server\ 2016\ \(64-bit\) new-name-label=NEWVM |
Delete VM
PowerShell:
$VMname = “VMNAME”

Remove-XenVM -Name $VMName
Command Line:
| Xe vm-list name-label=VMNAME
Copy VMUUID xe vm-destroy uuid=VMUUID |
Change VM Specs
PowerShell:
Enlarge RAM en vCPU
$VMname = "VMNAME"
$vCPU = 4
$RAMinGB = 4

$RAMinBytes = $RAMinGB*1073741824

Set-XenVM -Name $VMName -VCPUsMax $vCPU -VCPUsAtStartup $vCPU -Memory $RAMinBytes
Dicrease vCPU and RAM
$VMname = "VMNAME"
$vCPU = 2
$RAMinGB = 2

$RAMinBytes = $RAMinGB*1073741824

Set-XenVM -Name $VMName -VCPUsAtStartup $vCPU -Memory $RAMinBytes

Set-XenVM -Name $VMname -VCPUsMax $vCPU
Command Line
Change RAM
| Xe vm-list name-label=VMNAME
Copy VMUUID xe vm-memory-limits-set uuid=VMUUID static-min=2GiB static-max=2GiB dynamic-min=2GiB dynamic-max=2GiB |
Add more vCPU’s
| Xe vm-list name-label=VMNAME
Copy VMUUID xe vm-param-set uuid=VMUUID VCPUs-max=4 VCPUs-at-startup=4 |
Remove vCPU’s
| Xe vm-list name-label=VMNAME
Copy VMUUID xe vm-param-set uuid=VMUUID VCPUs-at-startup=2 xe vm-param-set uuid=VMUUID VCPUs-max=2 |
Add Disk to VM
PowerShell:
$VMName = "VMNAME"
$DiskName = "Disk02"
$DiskinGB = 20
$StorageRepositoryName = "Local Storage"

$DiskinBytes = $DiskinGB*1073741824
$VM = Get-XenVM -Name $VMname
$sr = Get-XenSR -Name $StorageRepositoryName

New-XenVDI -NameLabel $DiskName -VirtualSize $DiskinBytes -SR $sr -Type user

$VDI = Get-XenVDI -Name $DiskName

New-XenVBD -VM $VM.opaque_ref -VDI $VDI.opaque_ref -Type Disk -mode RW -Userdevice 2
Command Line
| xe vm-list name-label=VMNAME
Copy VMUUID xe sr-list name-label=”Local storage” Copy Storage UUID xe vdi-create sr-uuid=STORAGEUUID name-label=Disk01 type=user virtual-size=20GiB Output is DISKUUI xe vbd-create vm-uuid=VMUUID device=1 vdi-uuid=DISKUUID bootable=false mode=RW type=Disk |
Change VM Description
PowerShell:
Set-XenVM -Name "VMNAME" -NameDescription "DISCRIPTION"Command line:
| Xe vm-list name-label=VMNAME
Copy VMUUID xe vm-param-set uuid=VMUUID name-description=”DISCRIPTION” |
Export VM
PowerShell:
$XenHost = "YourXenServer"
$VMname = "VMName"
$ExportPath = “C:\Temp”

$VM = Get-XenVM -Name $VMname

Export-XenVm -Uuid $VM.uuid -XenHost $XenHost -path "$Exportpath\Export.xva"
Command Line:
| Mkdir /mnt/Export
mount -t cifs //server/share -o username=UserName,password=myPassword /mnt/export |
Create Snapshot
PowerShell:
$VMname = "VMName"
$Snapshotname = “SNAPSHOTNAME”

$VM = Get-XenVM -Name $VMname

Invoke-XenVM -Uuid $VM.uuid -XenAction Snapshot -NewName $Snapshotname
Command Line:
| xe vm-snapshot vm=VMName new-name-label=SNAPSHOTNAME |
Delete Snapshot
PowerShell
$Snapshotname = "SNAPSHOTNAME"

Remove-XenVM -Name $Snapshotname
Command Line:
| xe snapshot-list name-label=SNAPSHOTNAME
Copy Snapshot UUID xe vm-destroy uuid=SNAPSHOTUUID |
Start VM
PowerShell:
Invoke-XenVM -Name VMName -XenAction StartCommand Line:
| xe vm-start vm=VMName |
Stop VM
PowerShell:
Invoke-XenVM -Name VMName -XenAction ShutdownCommand Line:
| xe vm-shutdown vm=VMName |
Reboot VM
PowerShell:
Invoke-XenVM -Name VMName -XenAction CleanRebootCommand Line:
| xe vm-reboot vm=VMName |
Get VM List
PowerShell:
Get-XenVM | Where {$_.is_a_template -eq $False -and $_.is_a_snapshot -eq $False -and $_.domid -ne 0} | select name_label Command Line:
| xe vm-list |
Get Template List
PowerShell:
Get-XenVM | Where {$_.is_a_template -eq $True -and $_.domid -ne 0} | select name_label Command Line:
| xe template-list |
Get Snapshot List
PowerShell:
Get-XenVM | Where {$_.is_a_snapshot -eq $True -and $_.domid -ne 0} | select name_label Command Line:
| xe snapshot-list |
I hope this was informative. For questions or comments you can always give a reaction in the comment section or contact me:


Amazing stuff. Thanks for writing this.
Hi,
thanks for the mini Scripts.
I’ve a questin to the “From Windows 2016 64Bit Template” Script.
For me with Xenserver 7.6 the “Disk” Key in “other_config” doesn’t exist. How does it work for you?
“$other_config.Keys
folder
import_task
mac_seed
instant
base_template_name
install-methods”
the best supplement to this blog entry seems to be: https://github.com/ZachThurmond/Automated-XenServer-Labs/blob/master/AXL.ps1
Thanks,
I am finding it hard to find good documentation for Citrix Hypervisor.
Can you please recommend where I can read more about the PowerShell cmdlets?