
HOW TO: Publish an app from Ivanti Workspace Control to Citrix Cloud
 Ivanti Workspace Control (former RES ONE Workspace), is a great workspace management solution. It uses “just in time” technology to manage your users’ desktop form A to Z, including profile management, drive mappings, Start Menu management, printer management and many more. Another offered capability is to publish managed applications directly to Citrix. Just fill in your delivery controller and go. But Citrix is of course moving to the cloud with Citrix Cloud. So you don’t have a delivery controller anymore. No problem! In the newest Ivanti Workspace Control release (10.3.70.0) you can publish managed applications directly to the Citrix Cloud. In this blog I will explain how you can do this.
So let’s get started! First download the latest release from Ivanti Workspace Control from the Ivanti Community here. After that, run the auto upgrader on your agents and management server (just like any other update). Now go to your management server and open Regedit and go to:
![]()
Create a new String Value named EnableCTXCloud with the value yes.
![]()
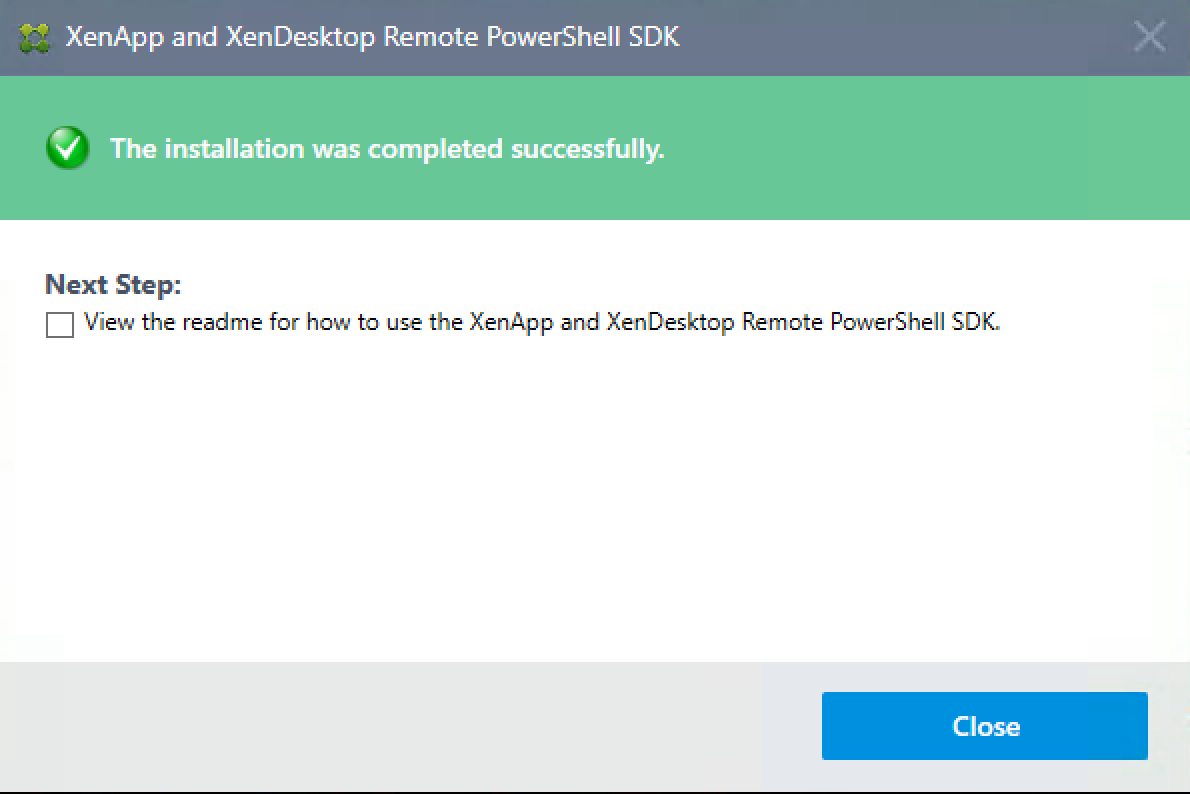
Now we need to install the Citrix Remote PowerShell SDK. You can download it from Citrix Blog website here.
Scroll down to the bottom and click on :

Now install the SDK on the management server.
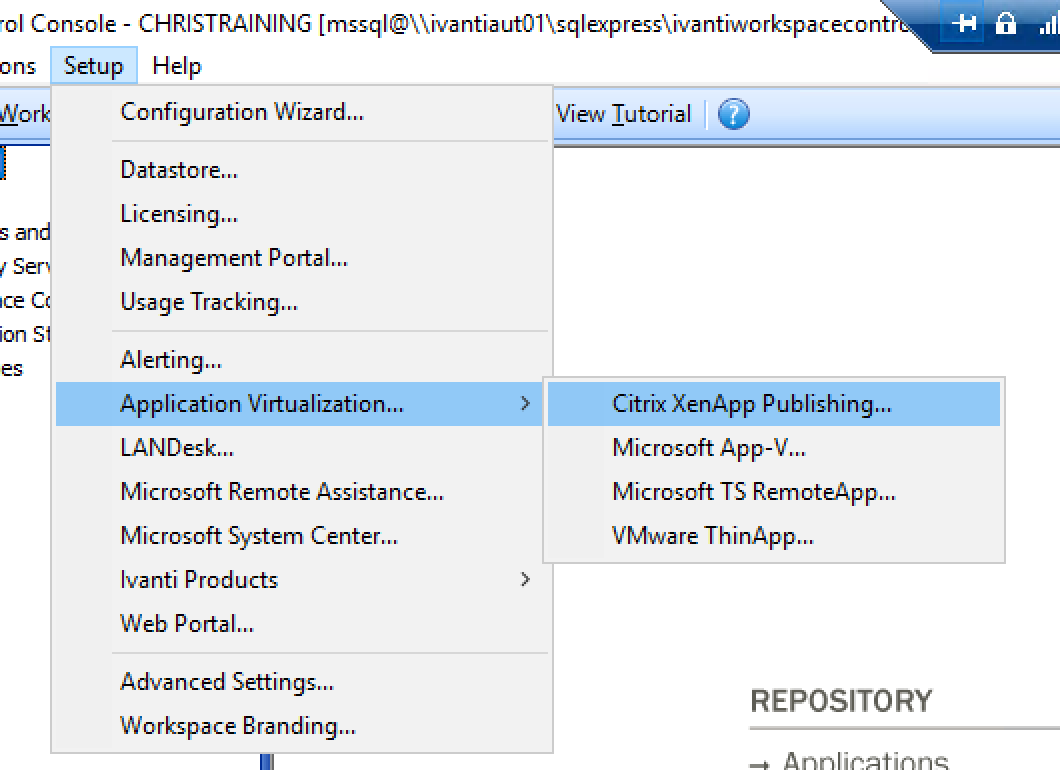
After the SDK is installed, open up the Ivanti Workspace Control Console and click Setup-> Application Virtualization… -> Citrix XenApp Publishing…
If the Windows Registry is set correct you will see a Citrix XenApp Cloud tab.
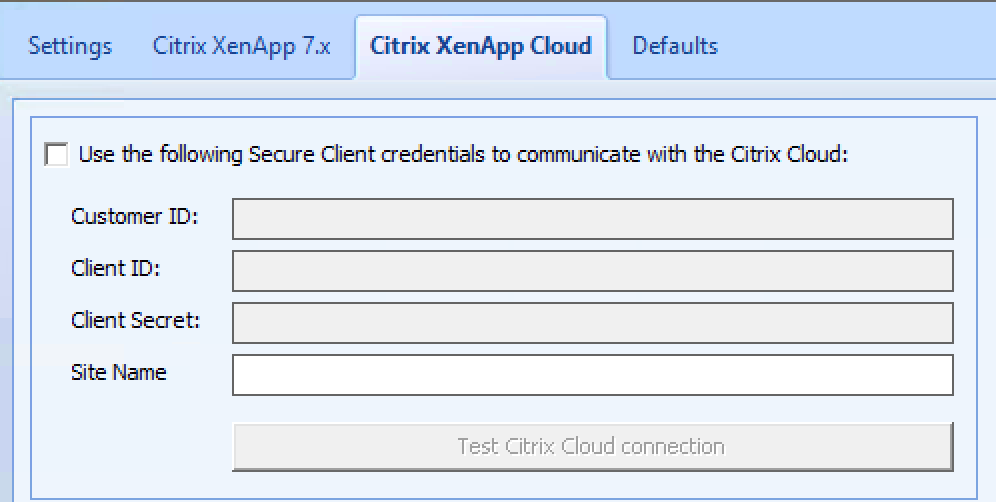
We now need to get our Citrix Cloud Customer ID, Client ID and Client Secret. Go to citrix.cloud.com and sign in to your Citrix Cloud account. Once you’ve signed in open up the hamburger menu and click on Identity and Access Management.
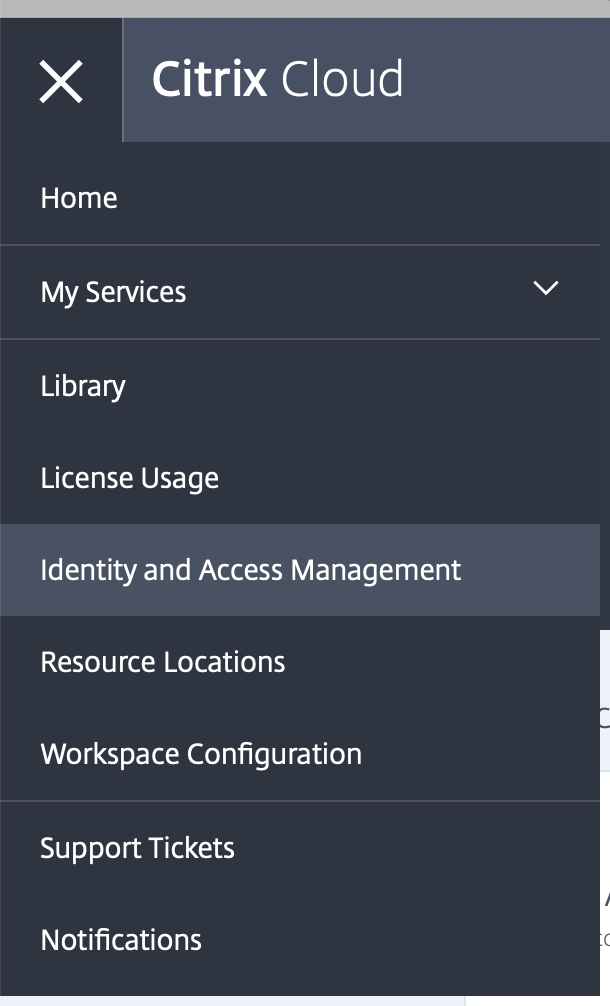
Go to the API Access tab. Here you can see your Customer ID. In this example it starts with Citrix. Copy the customer ID to the Customer ID field in Ivanti Workspace Control Console.
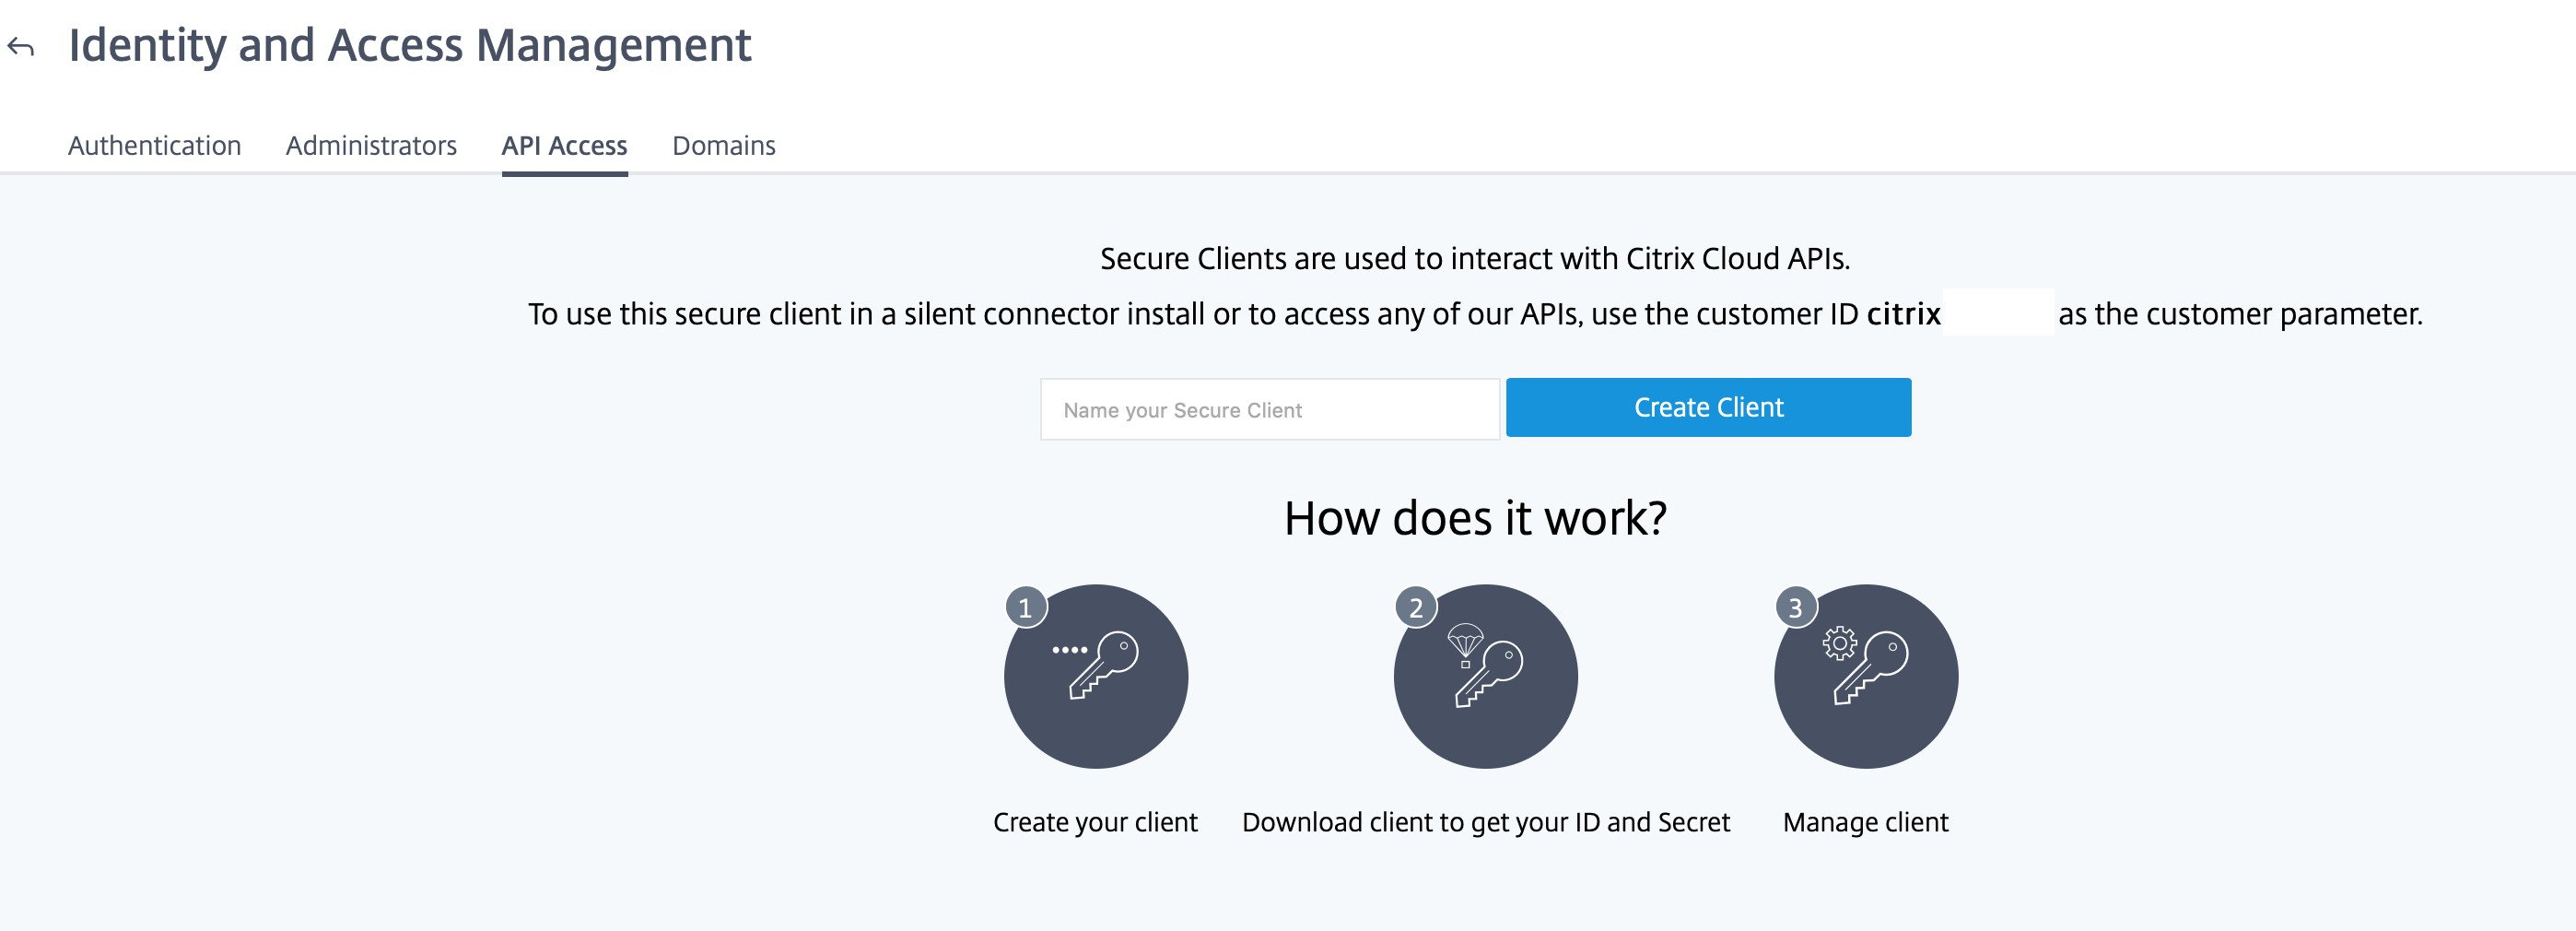
Fill in a name for your new secure client; for example Ivanti-Workspace-API-Connection and click on Create Client.
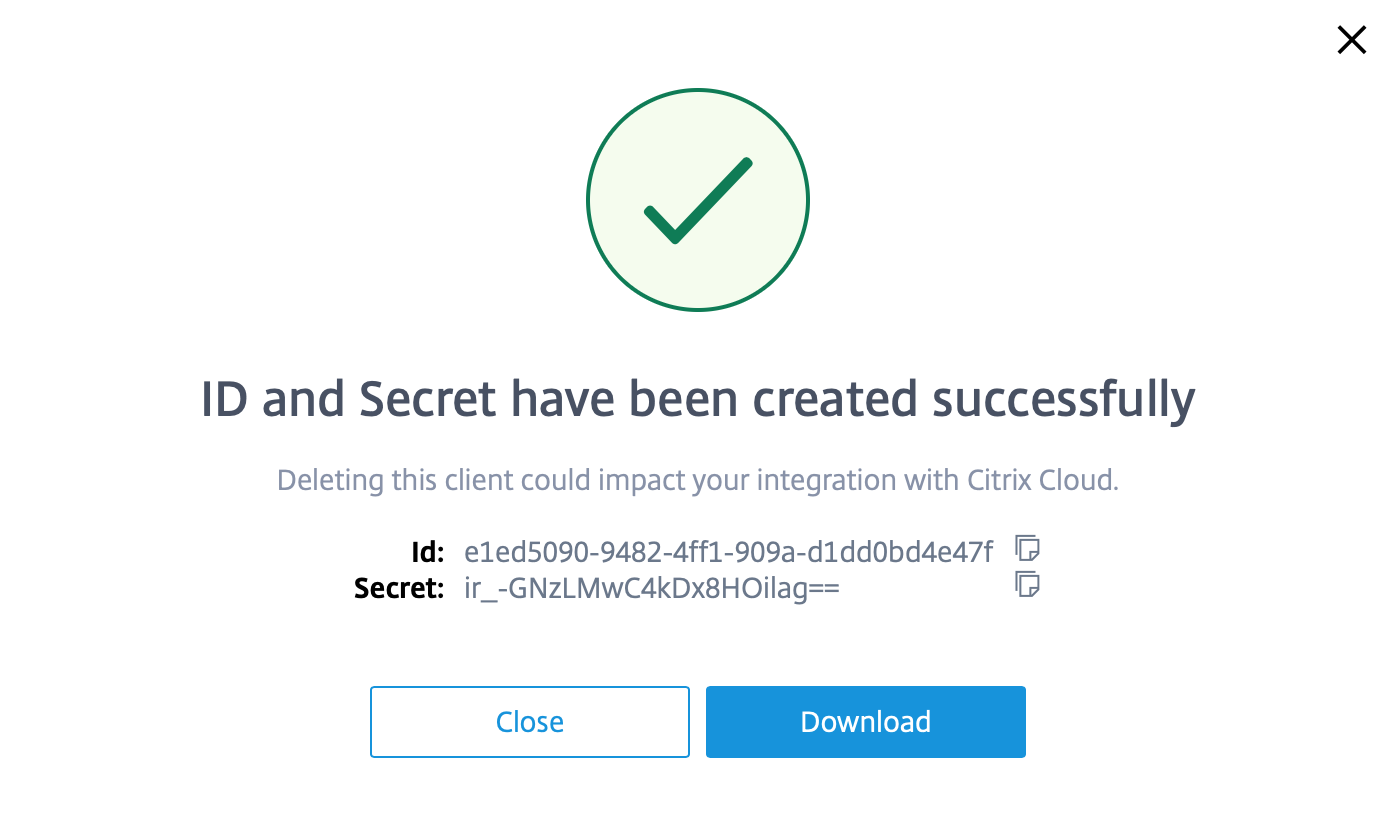
Now you can see your Client ID and Client Secret, copy these to the Ivanti Workspace Control Console. TIP: Click on download to save the information in a CSV file because the Citrix Cloud website will not show the secret again.
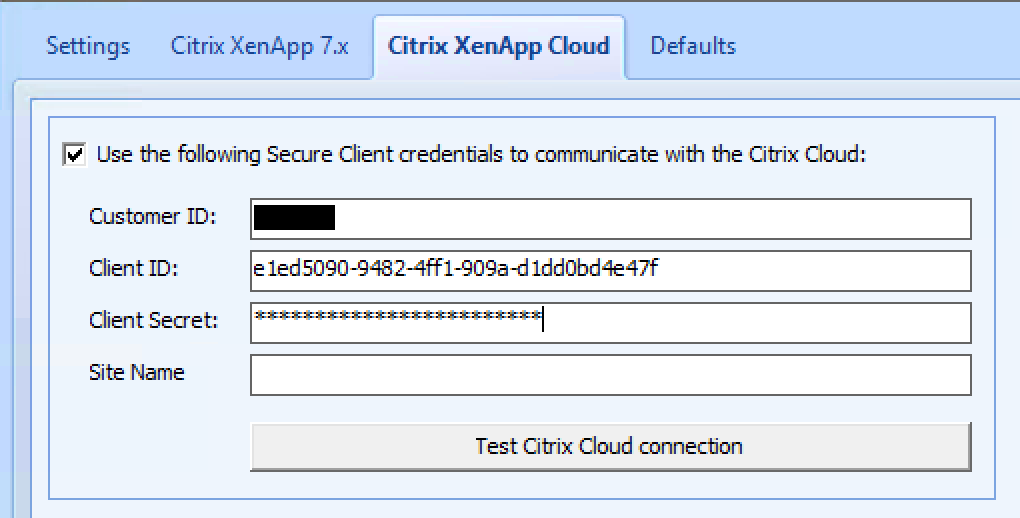
Now that everything is configured in you can click on Test Citrix Cloud Connection.
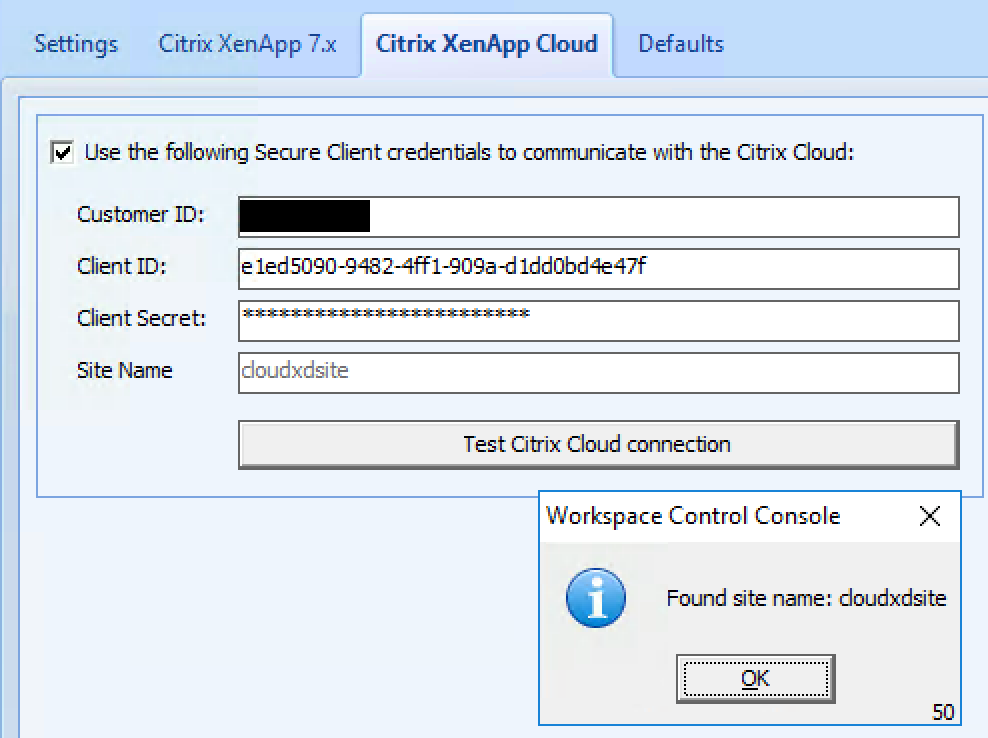
If everything went well you should get a message that the site name is found. Click on OK and save settings.
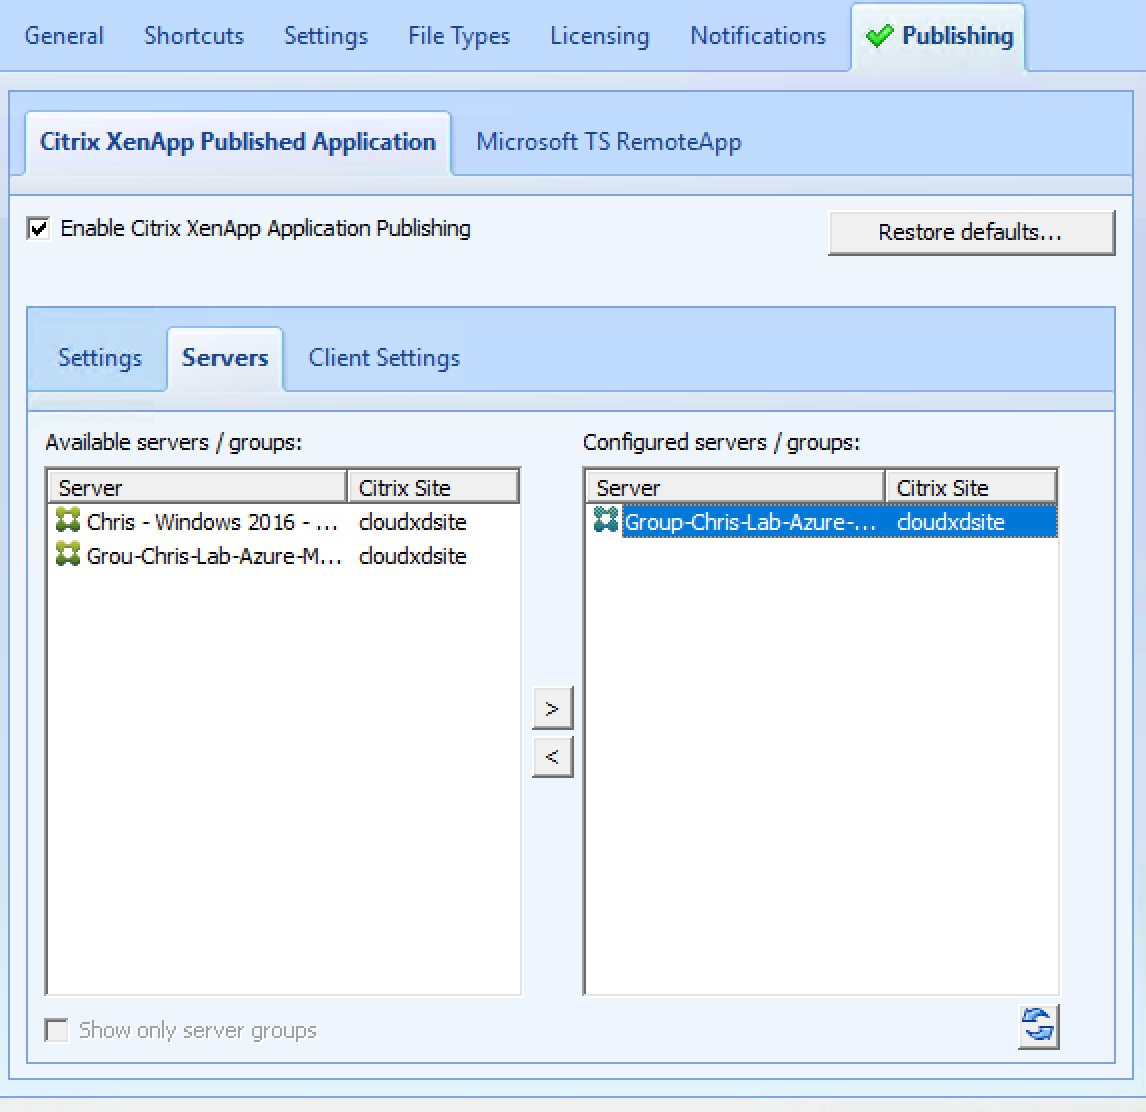
Now open up an application you want to publish, for example Internet Explorer. In the application settings go to the Publishing tab.

Click on Enable Citrix XenApp Application Publishing and go to the Servers tab and click on the Refresh icon.
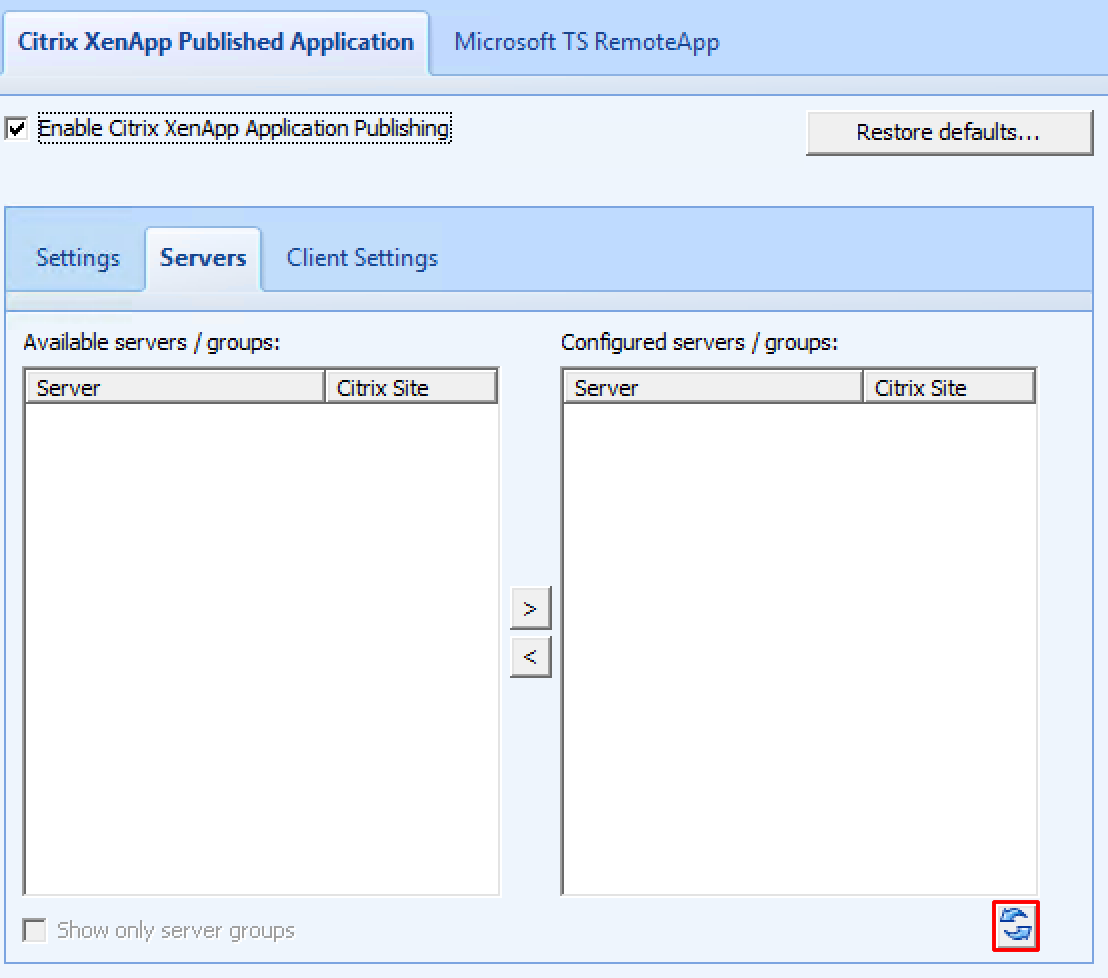
Now you will get a list of your delivery group, select the correct delivery group and click OK.
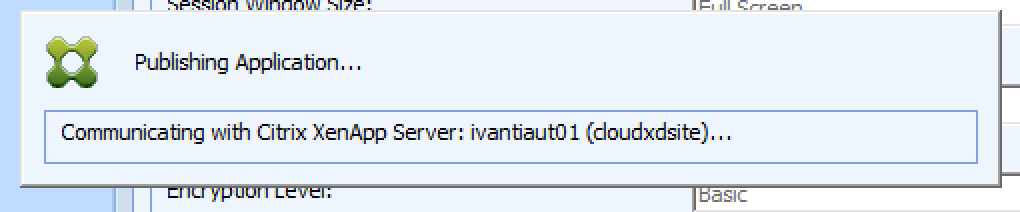
The application will now be published to the Citrix Cloud.
You can now go back to your Citrix Cloud site and view the published application in your Virtual Apps service.
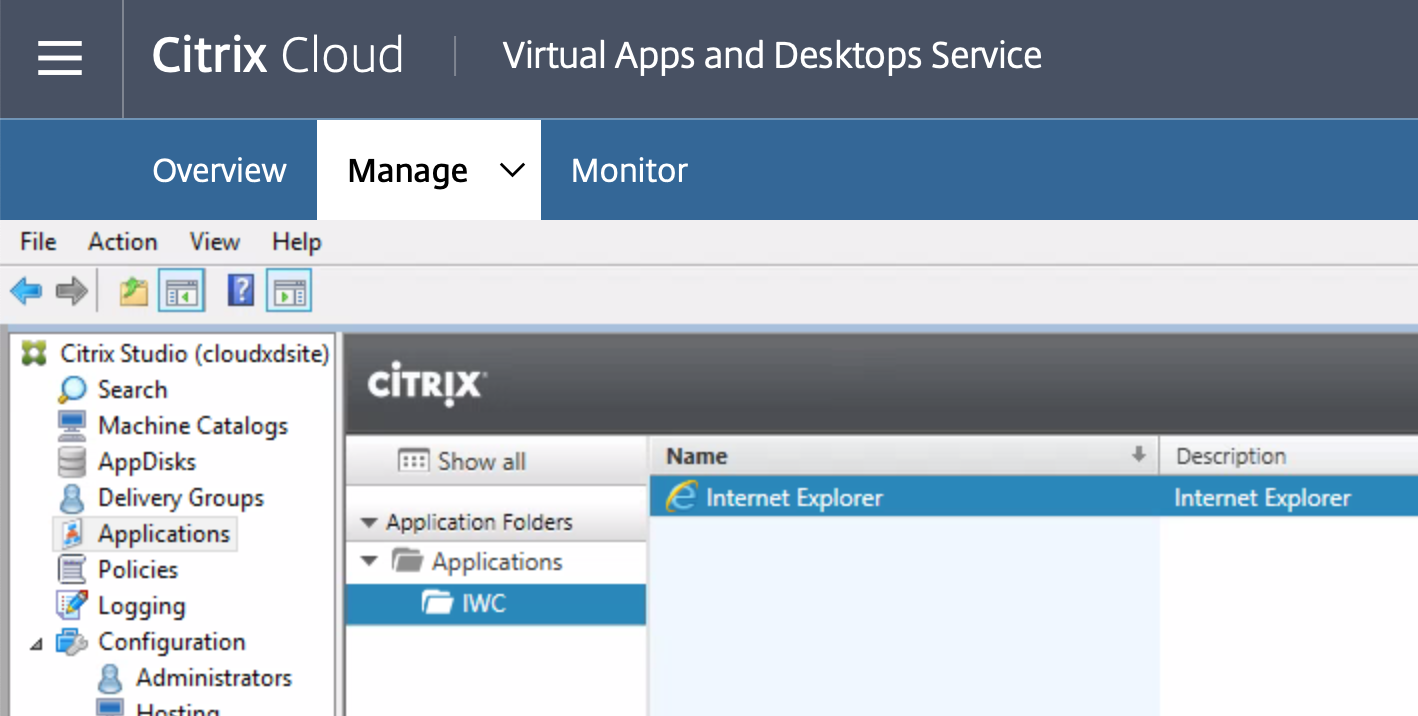
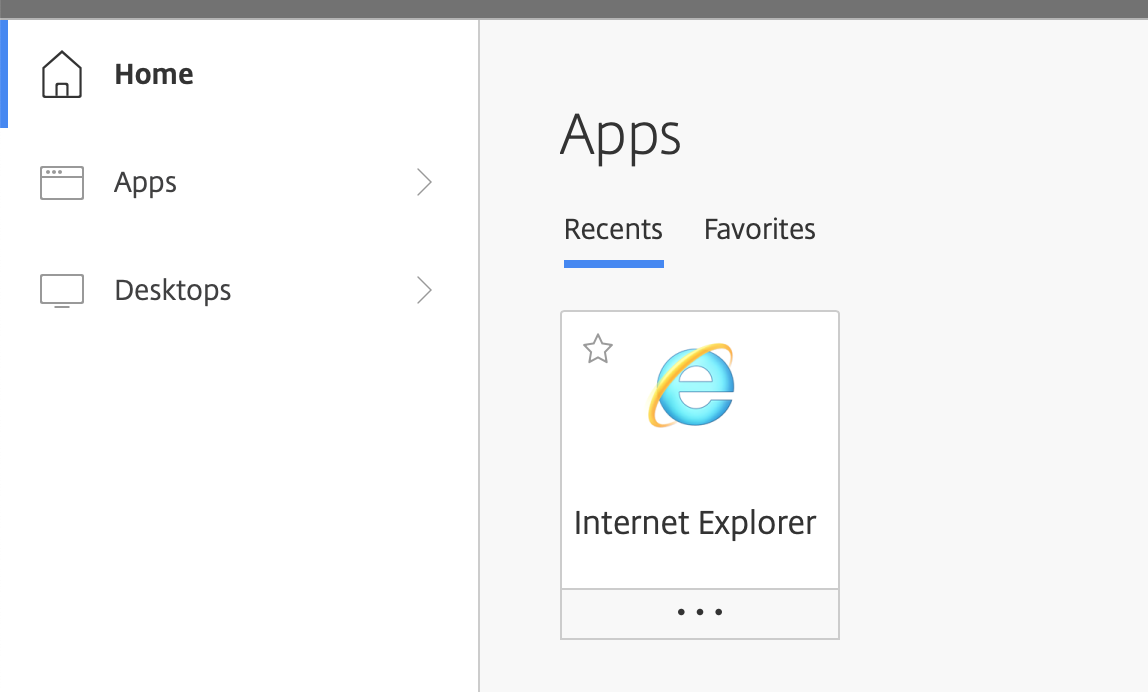
Now when a users signs in they can see the Managed Application Internet Explorer.
I want to give a big thanks to Dennis van Dam who helped me with this blog !
I hope this was informative. For questions or comments you can always give a reaction in the comment section or contact me: