
The Ultimate Golden Image Automation Guide – Part 2 Deploying software – Ivanti / RES ONE software, Citrix VDA, Citrix PVS Target Device and Middleware
 Welcome to the second part of the Ultimate Golden Image Automation Guide. The goal is still to create a new Golden Image by scheduling just one deployment Run book without extra manual tasks. This Guide will be in three parts, the first part is Preparation – Citrix Provisioning Services and Ivanti/RES ONE Automation. The second part is Deploying software – Ivanti / RES ONE software, Citrix VDA, Citrix PVS Target Device and Middleware. The third part is Optimzing/Sealing and Imaging vDisk – BIS-F sealing script and VMware OS optimization tool.
Deploying Software
This is the second part and in this part of the guide we will be deploying software onto our TargetVM that will become the Golden Image vDisk. We can split the software in the Golden Image into three categories:
- Middleware (Java, .NET, etc..)
- Applications (Office, PDF Reader, etc..)
- Management Tools (Citrix VDA, RES ONE Workspace Agent, etc..)
We’re going to make each category into its own Project. And finally add them to the Deployment Run book.
Deploy Middleware

The middleware we’re going to put in the Golden Image will be .NET 3, .NEt 4.7, Adobe Flash, Java and Silverlight. We then finish the project with a Reboot.
Install .NET 3
.NET 3 will be deployed with a PowerShell script. The script is:
Install-WindowsFeature Net-Framework-Core -source “NETWORKPATH\Microsoft\Win2016\sxs”
The folder we specify after source needs to have the “microsoft-windows-netfx3-ondemand-package.cab” file. You can find this file in the ISO of the Windows installation media in the folder Sources\sxs.

Install .NET 4.7
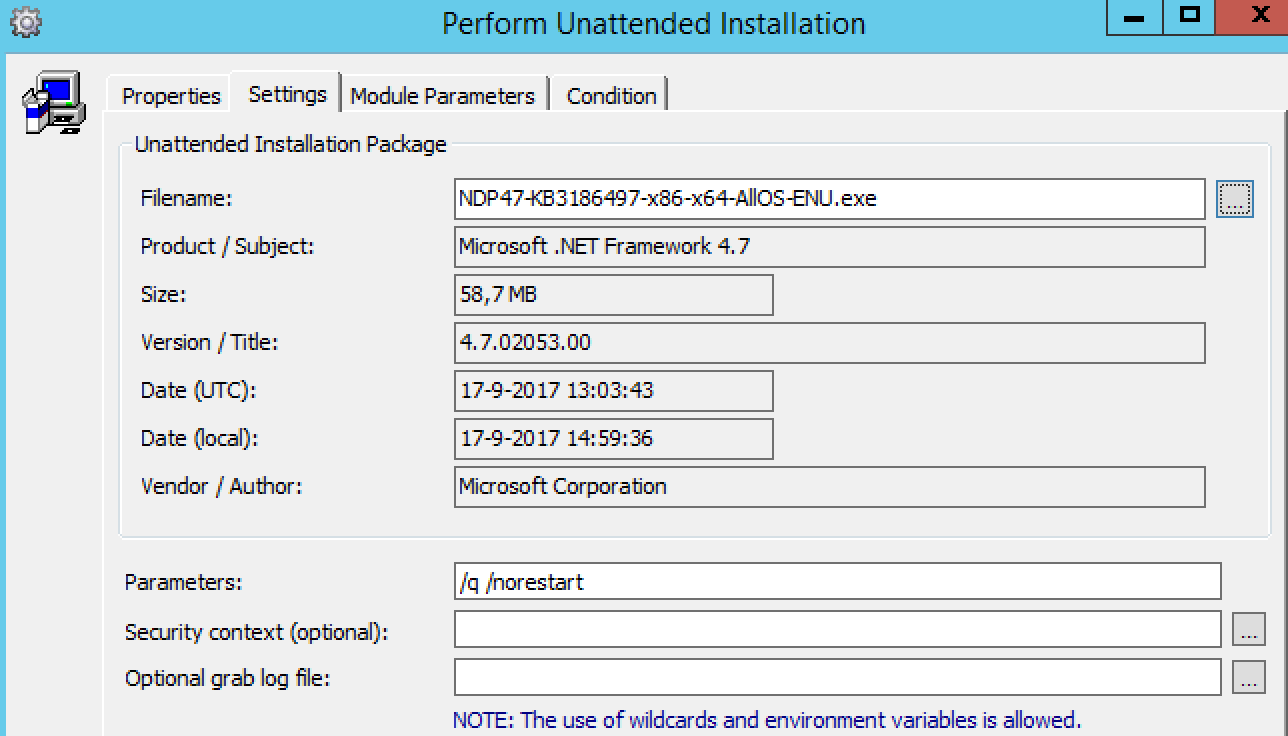
We’re going to deploy .NET4.7 with a Unattended Installation Task. First we’re going to download the .net 4.7 offline installation file from Microsoft here. Now we need to add the installer to the Automation Resources. I always use a linked resource to a File share, this saves space in the Database.

Now we need to create the Unattended Installation task and enter the right installation parameters. These are /q /norestart for .NET 4.7
After the installation we add a Postpone job for 3 minutes so that the target VM can finish the .NET optimizations. After that we add a Reboot.

Install Adobe Flash
Because we use Windows 2016 we only need to Install the Adobe Flash plugin and not the Active-X component. We need to download the offline flash installer from Adobe here. Now we need to add the installer to an Automation Resource. After that we need to create a Windows Installer Package task and select the Adobe Flash resource.

We don’t need to set extra parameters.
Install Java
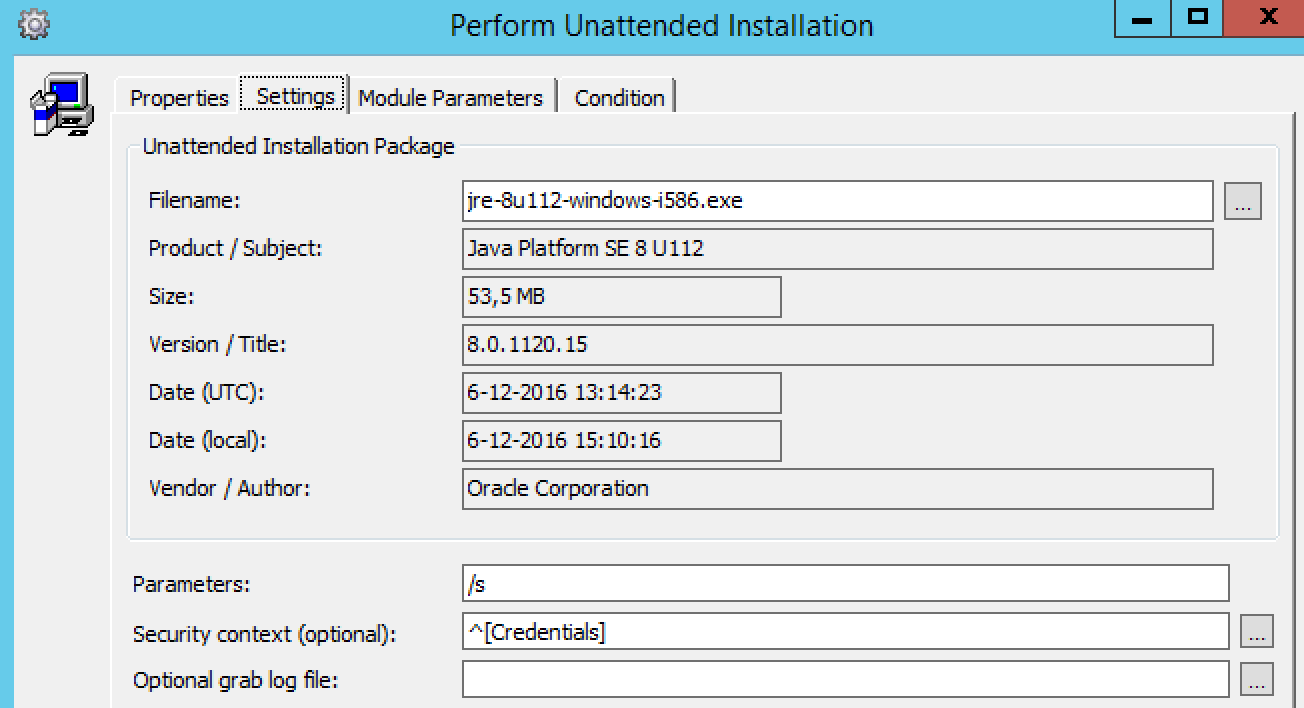
We are going to download the latest Java release from Oracle here. After that we add the installer .Exe to the Automation resources. Now we create an Unattended Installation Task and we set the /s switch for silent install.
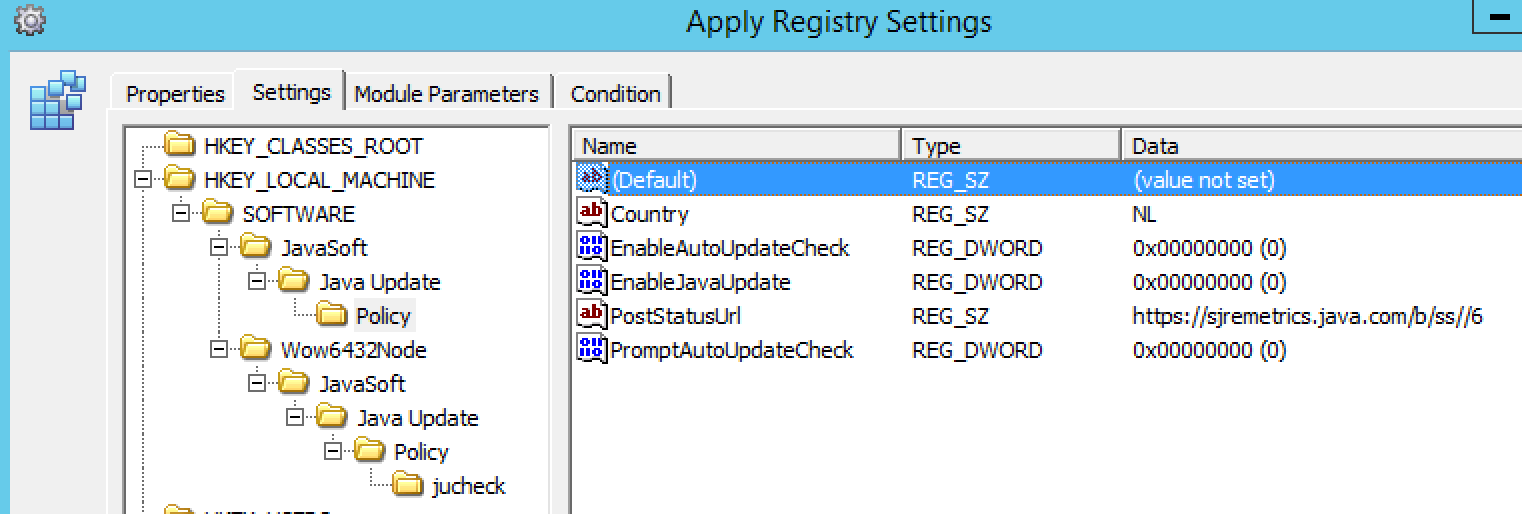
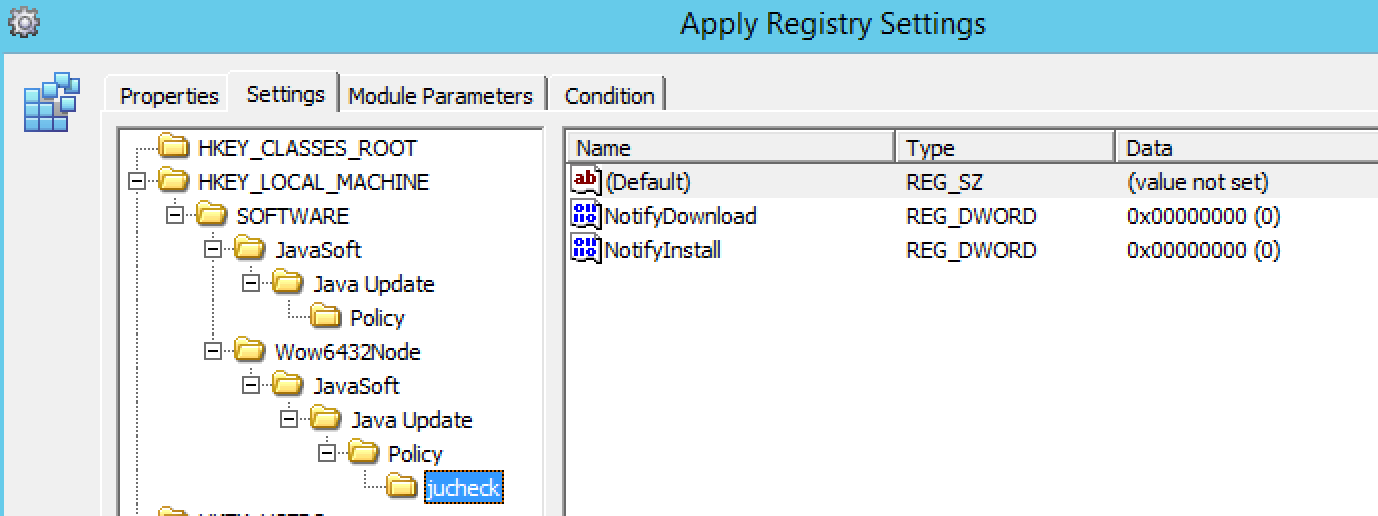
After that we create an Apply Registry task to Disable checking for updates like this:
Install Silverlight
We’re going to download the latest silverlight plugin from Microsoft here. After we add the .exe to an Automation Resource. Now we’re going to create an Unattended Installation Task. Select the Silverlight Resource and enter the following Installation parameters: /q /doNotRequireDRMPrompt /ignorewarnings /noupdate

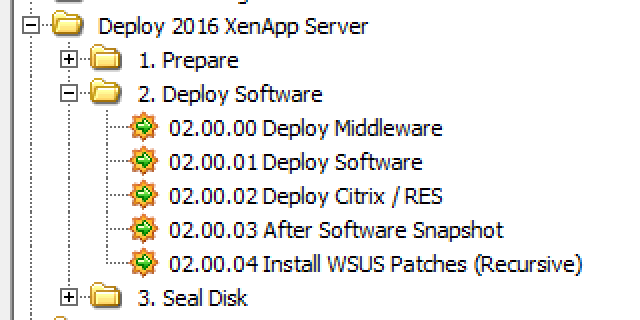
Now we just need to add all these modules to a new Project, named 02.00.00 Deploy Middleware.
Deploy Applications
Now we’re going to create a project for the user applications. In this project we’re going to add all the applications that are needed for the users to work on the system. So applications like Microsoft Office, Exact Financing, PDF reader, GIMP, Firefox, etc etc etc.. This project will be different for every environment based on the environment needs. But to help you out here are some of the installation parameters for some common applications:
- Microsoft Office 365, /Configure “install.xml” create your XML with this awesome Click-To-Run Configuration XML editor on GitHub.
- FileZilla, /S
- Mozilla Firefox, -ms
- Foxit PDF Reader, /verysilent /quiet /norestart
- GIMP 2.8, /silent /norestart /SUPPRESSMSGBOXES
- WinRAR, /S
- Microsoft VisioViewer, /quiet
- OwnCloud Client, /S /LocalSyncFolder=FOLDER /DestinationURL=URL
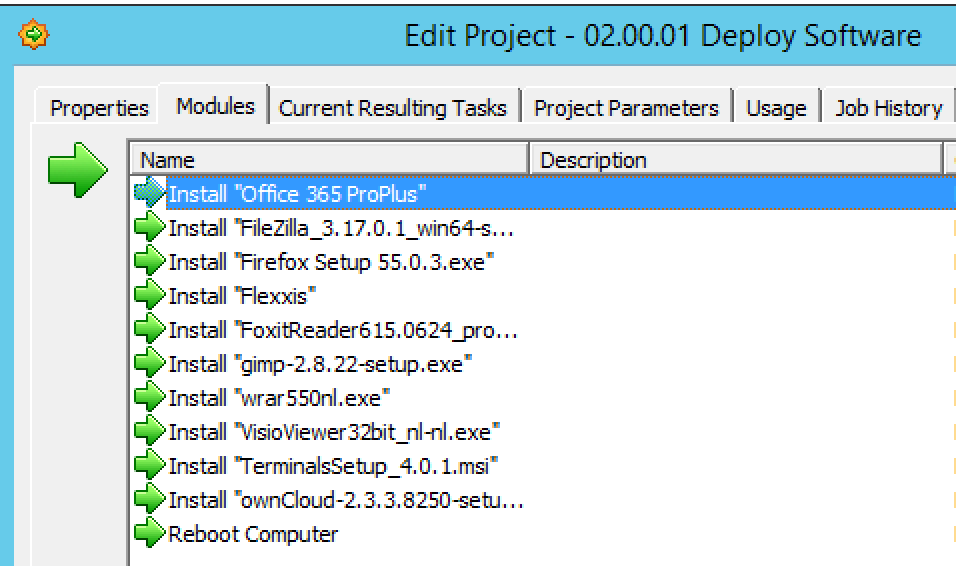
Now add all the modules to a new Project and name it 02.00.01 Deploy Software. We’re also going to add a Reboot task as a last task.
Deploy Citrix / RES
Now we’re going to create modules and a Project for the last category of applications. These are Management Tools, applications we need to lock down the desktop and make the desktop available to the user.

Install RES ONE Identity Directory Client
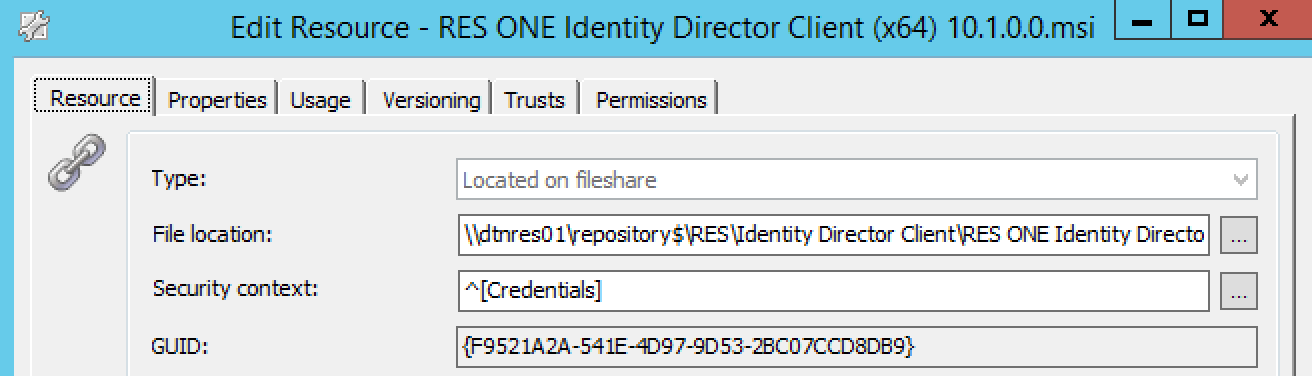
We’re going to install the Identity Directory Client from the RES Success center here. After that we are going to add the .MSI to an Automation Resource.
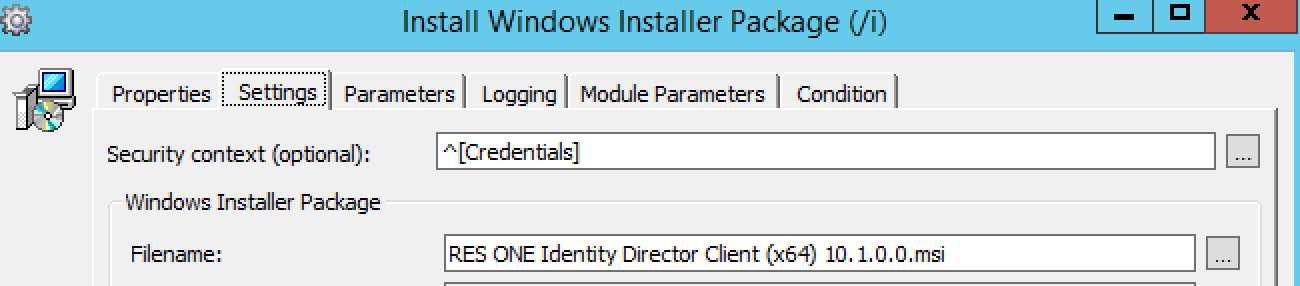
After that we create an Install Windows Package task and select the MSI.
At the Parameters tab we add the following:
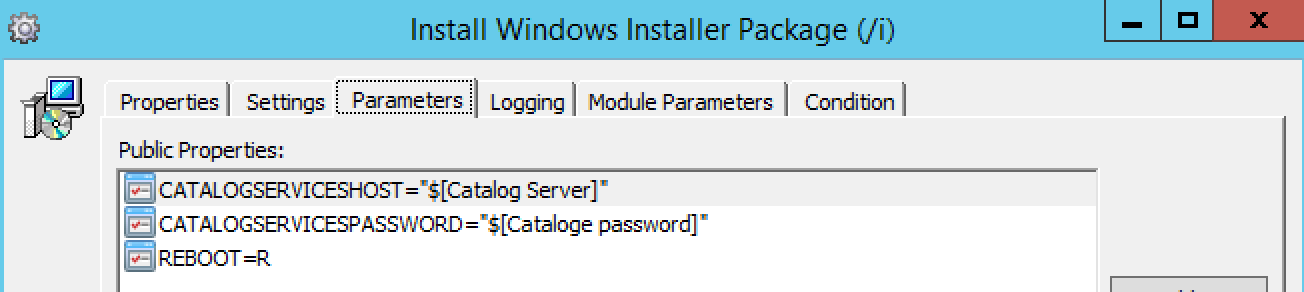
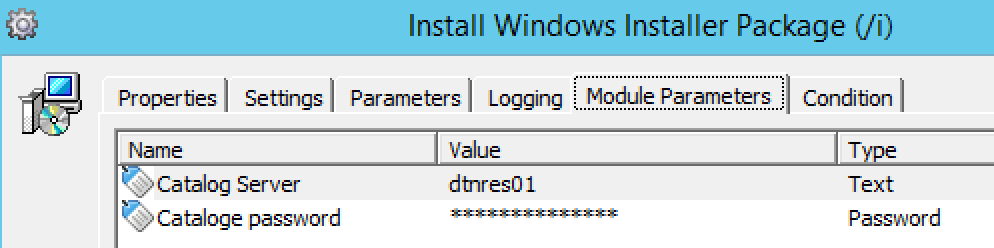
At module parameters you can fill in the correct settings for your environment.
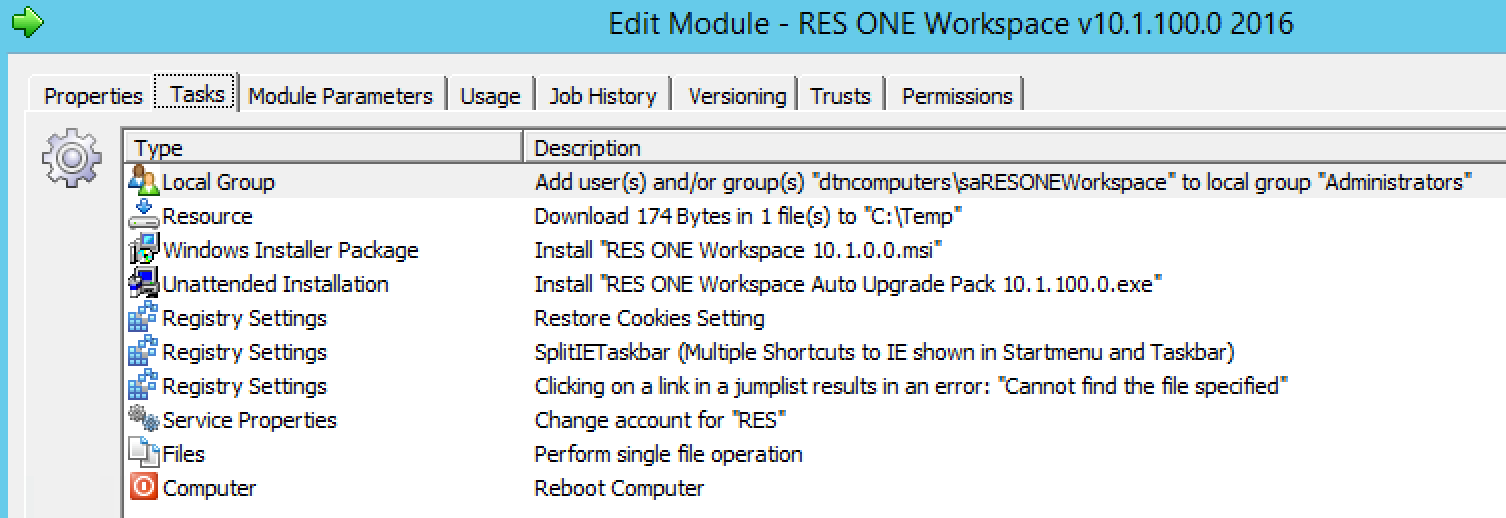
Install RES ONE Workspace
You can download a complete RES ONE Workspace installation Module from the RES Hub here this module is created by Rob Aarts. The module comes with handy parameters and registry settings. Because I use a service account for my RES ONE Workspace Agent I added a task to add my service account to the local administrators. After the installation I added a task to change the RES Workspace Agent Service to run with the service account. You can find all silent installation parameters here.
Install Citrix VDA
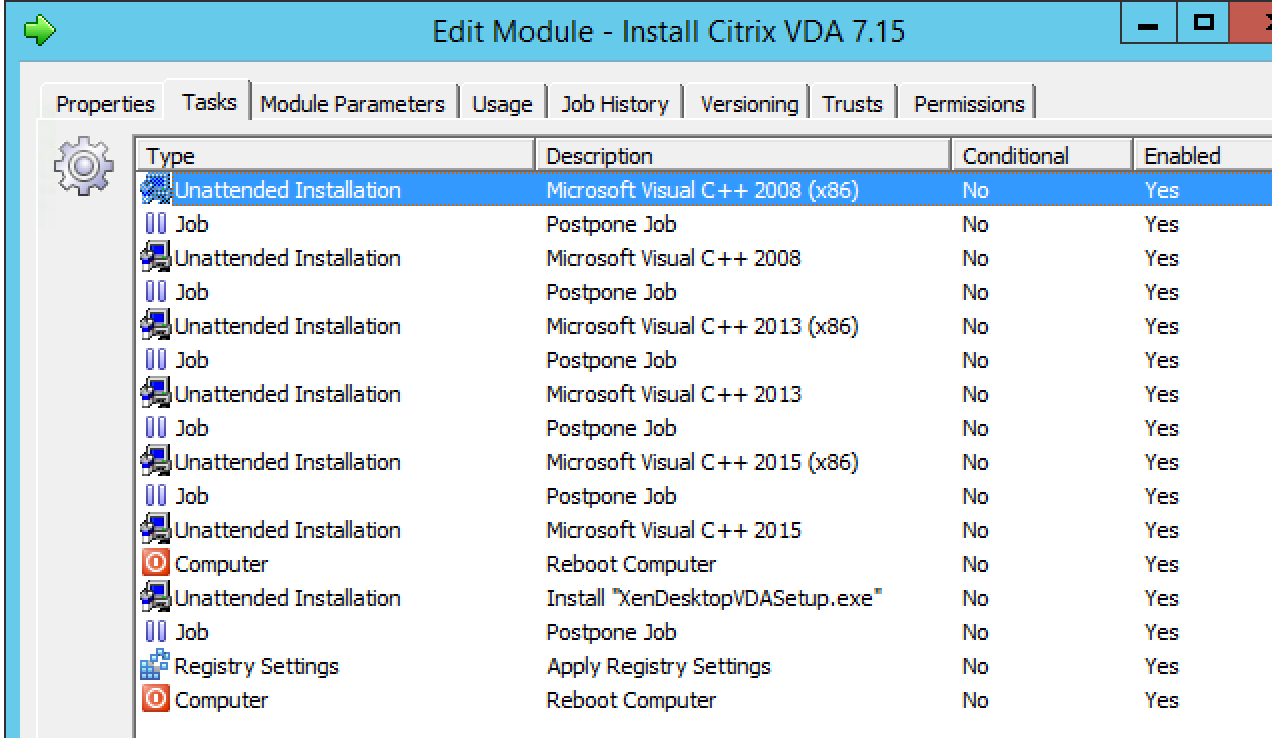
Now we need to create a module to install the Citrix VDA. As we said in part 1 we are using Citrix 7.15. To install the Citrix VDA silent we first need to install all prerequisites. These are Microsoft Visual C++ 2008, 2013, 2015 (x86), (x64) . All these setups are in the Citrix XenDesktop ISO under Support:

Now we’re going to add all the vcredist_x86.exe and vcredist_x64.exe of these folders to Automation Resources. We need to create an Unattended Installation Task for all these vcredis_XXX.exe. The silent install parameters are the same for all, these are: /q /norestart

After every vcredist installation we add a 10 Second postpone job and we finish with a Reboot.
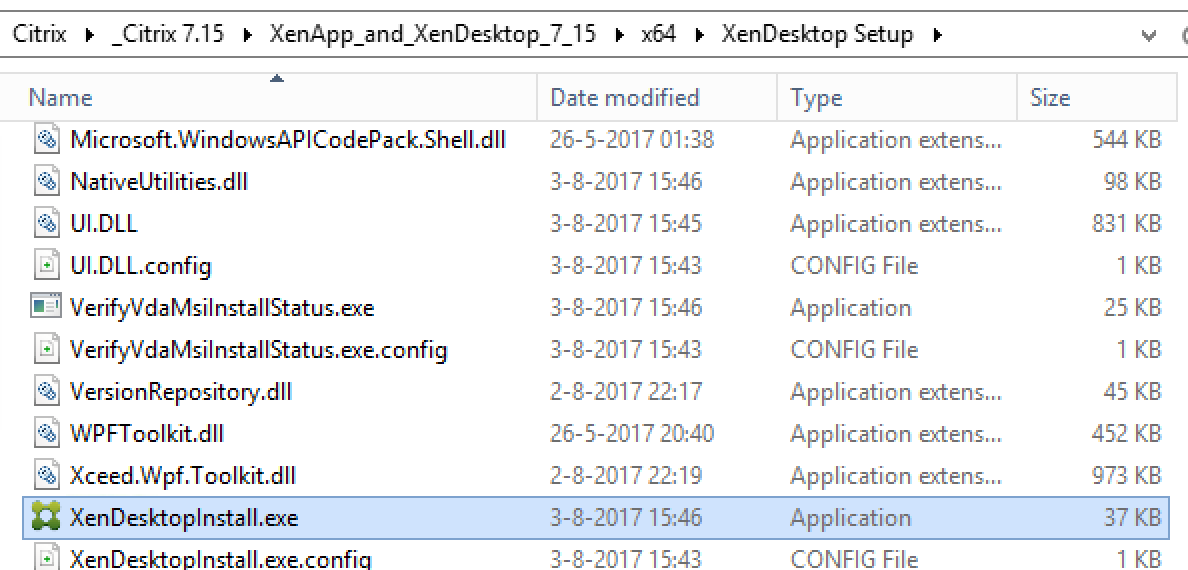
Now we’re ready to start the installation of the XenDesktopVDA.exe installation.
First we need to link the .exe to an Automation resource. You can find the installer on the XenDesktop ISO in the folder x64 XenDesktop Setup.
We’re going to copy the whole folder to a file share and link it to an Automation Resource:
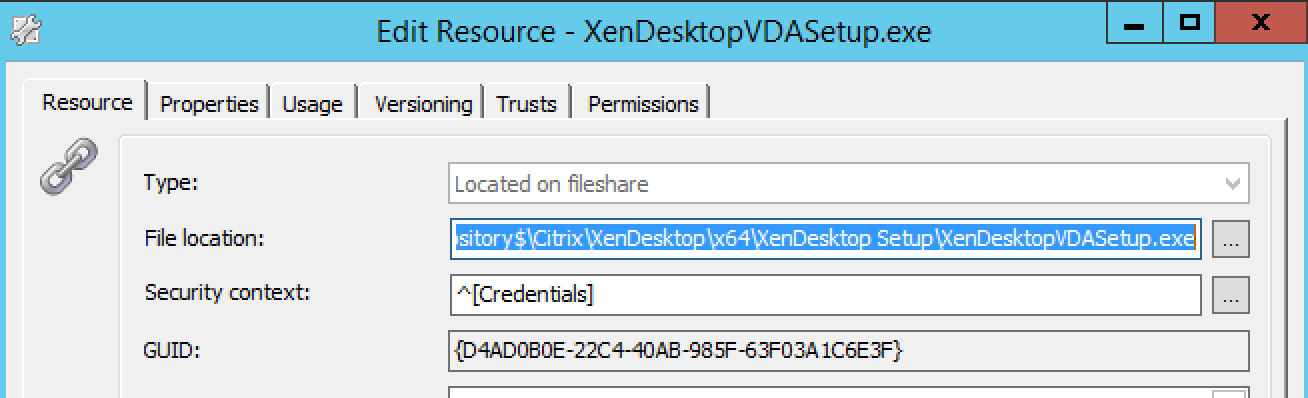
Now we’re going to create an Unattended Installation task and select the XenDesktopVDASetup.exe. We need to set the correct installation parameters, these are: /quiet /components vda,plugins /controllers “YOURCONTROLLER” /enable_hdx_ports /optimize /noreboot /masterimage After the installation task we add another postpone task of 60 seconds to make sure the setup is correctly finished. Because it can sometimes happen that the controller parameter doesn’t work correctly, we’re going to add the controllers again through the registry. We’re going to create an Apply Registry task and configure it as follows:

Of course you must add your own Delivery Controllers as the value of the ListOFDDCs . If you have multiple leave a blank space between them.
Now we add another reboot and the module is done.
Install Citrix PVS Target Device Software
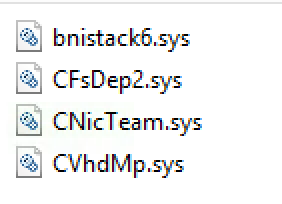
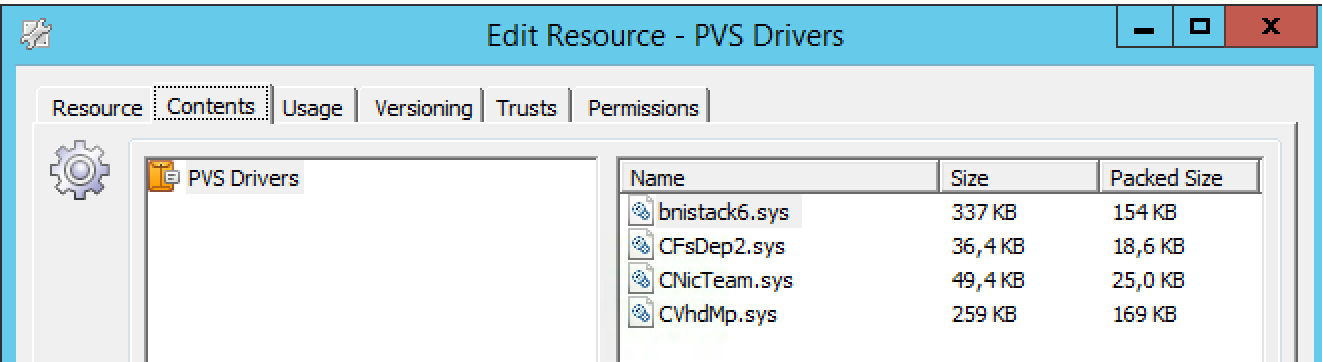
So the last application we’re going to install is the Citrix PVS Target Device Software. And this is a tricky one! Because the installation registers a few driver .sys files in the system32 folder and this doesn’t work when silent installing the PVS target device software. To fix this we need to manually copy the drivers, but first we need to get the drivers. We do this by installing Citrix PVS Target Device manually for one single time. Logon to Target VM and install the target device software. You can find this on the ProvisioningServices715 ISO, in the folder Device. It’s called PVS_Device_64.exe. After the one time manual install we go to C:\Windows\System32 and copy to following files to a network share:
Now we’re going to add these files to an Automation Resource Package:
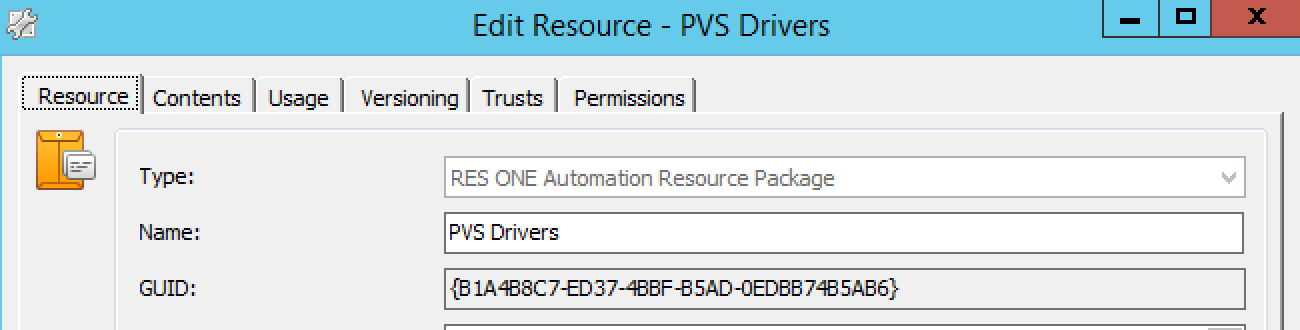
Add the drive files to the Contents tab:
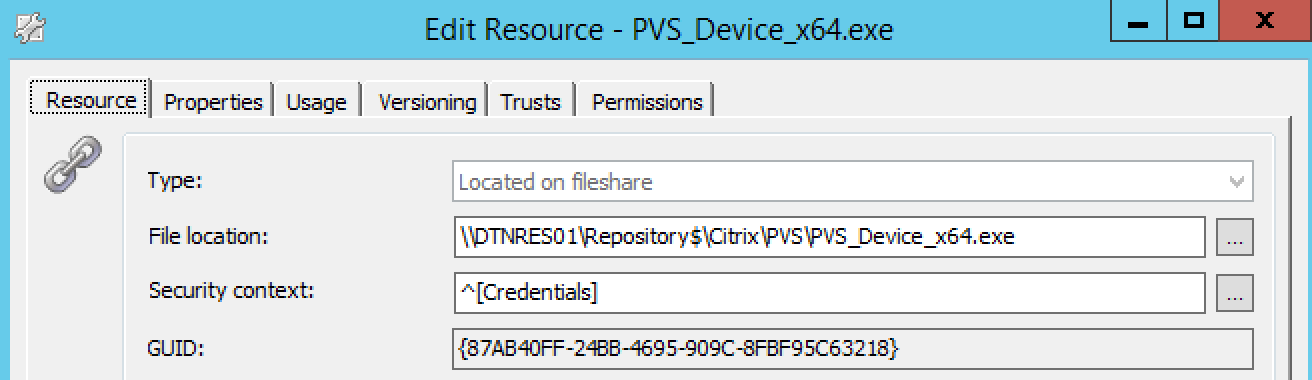
Now we’re also going to add the PVS_Device_x64.exe to an Automation Resource:
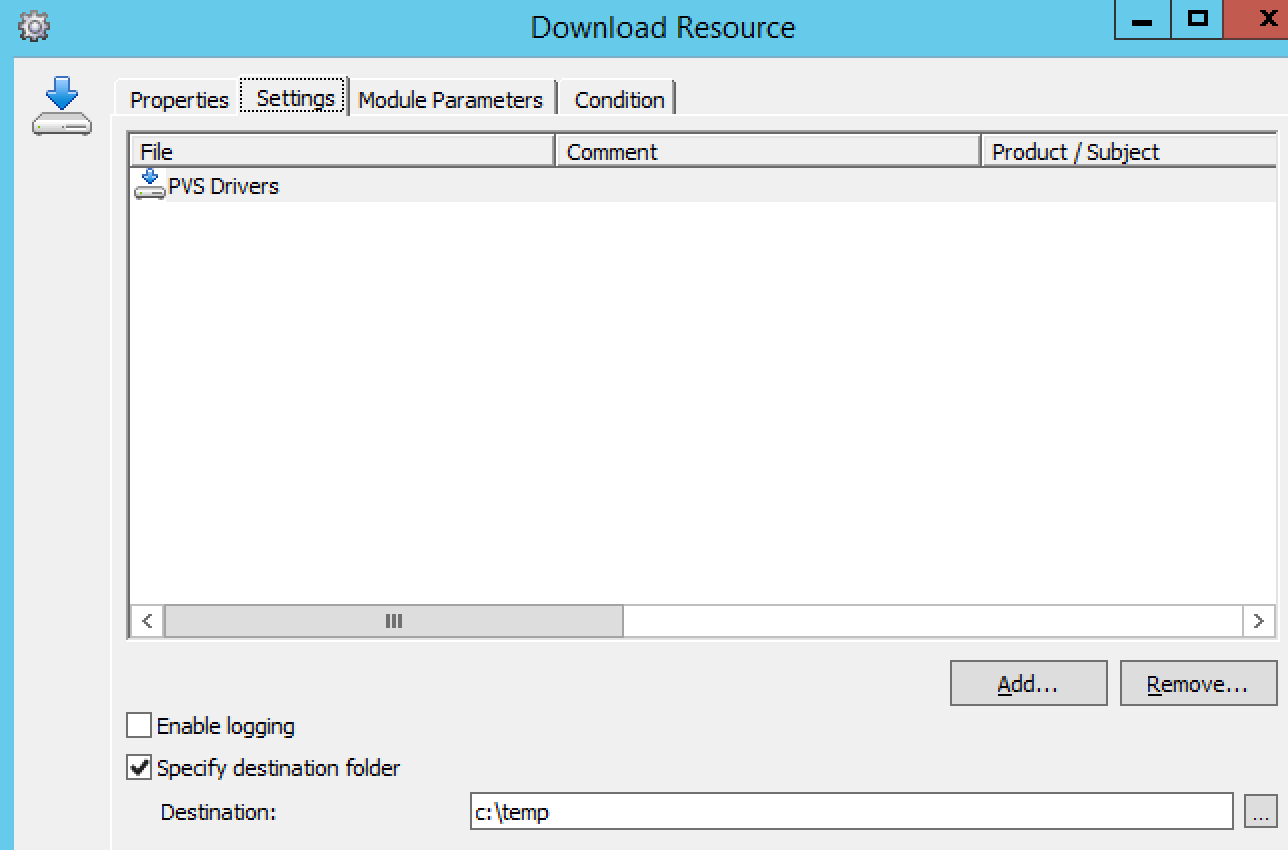
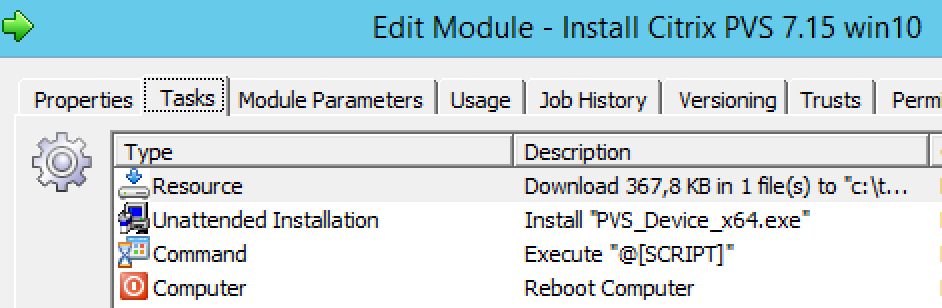
Create a new module with a resource Download task and configure it as follows:
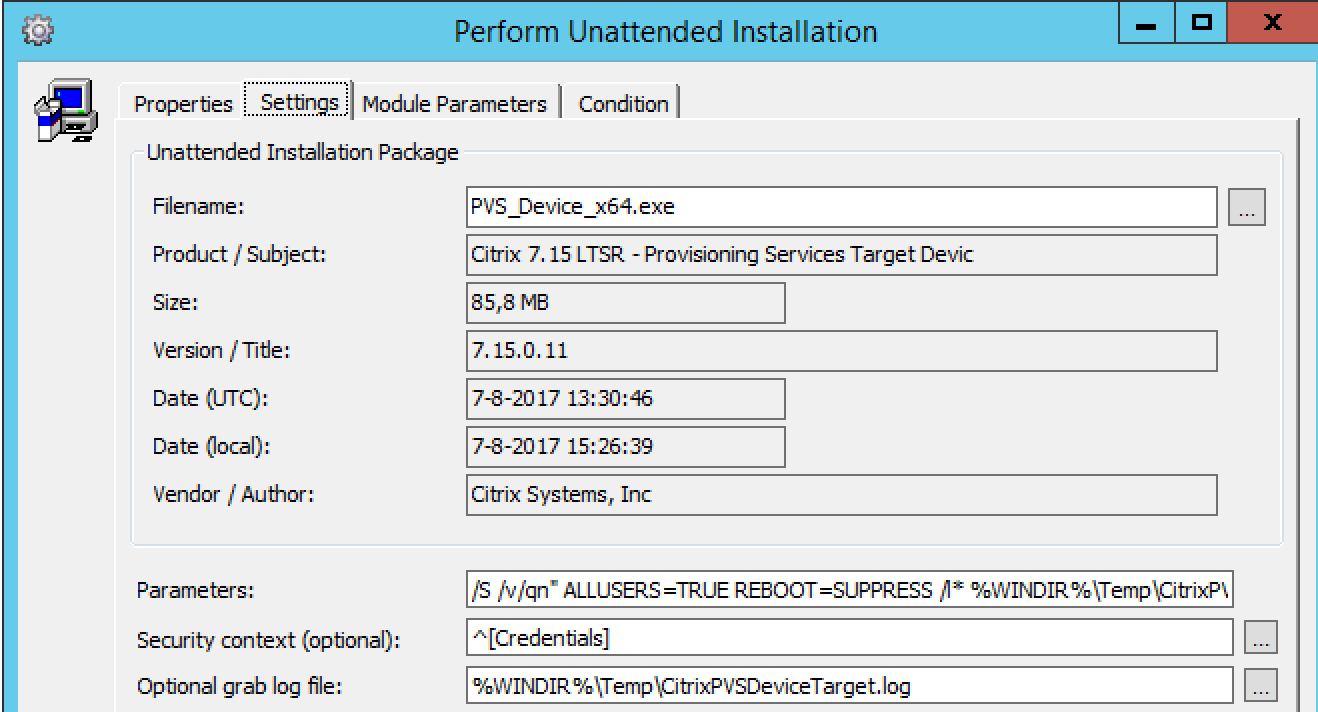
Create an Unattended Installation task. Select the PVS_Device_x64.exe and add the following parameters:
/S /v/qn” ALLUSERS=TRUE REBOOT=SUPPRESS /l* %WINDIR%\Temp\CitrixPVSDeviceTarget.log”
At the Optional grab log file, enter %WINDIR%\Temp\CitrixPVSDeviceTarget.log
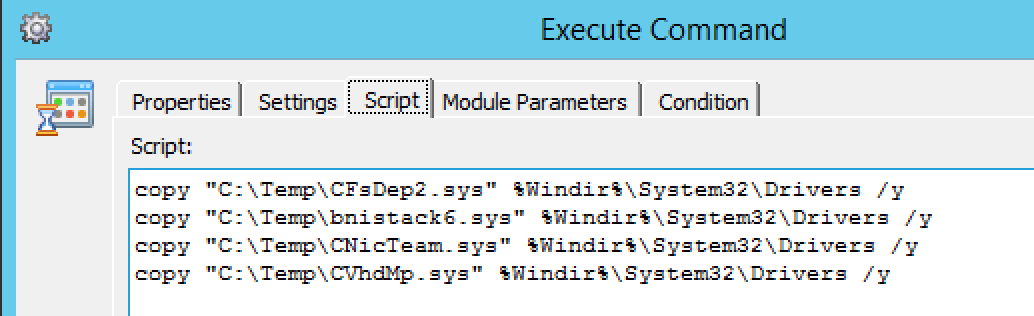
Now we’re going to add an Execute command task and add this command:
copy “C:\Temp\CFsDep2.sys” %Windir%\System32\Drivers /y
copy “C:\Temp\bnistack6.sys” %Windir%\System32\Drivers /y
copy “C:\Temp\CNicTeam.sys” %Windir%\System32\Drivers /y
copy “C:\Temp\CVhdMp.sys” %Windir%\System32\Drivers /y
We’re going to add a Reboot task and we’re done!
Add all the modules to a new Project and name it 02.00.02 Deploy Citrix RES.
Create Snapshot (Optionally)
For the same reasons as in part 1 we can add a extra snapshot of the targetVM after installing the software. Create a new snapshot task and configure it as follows:
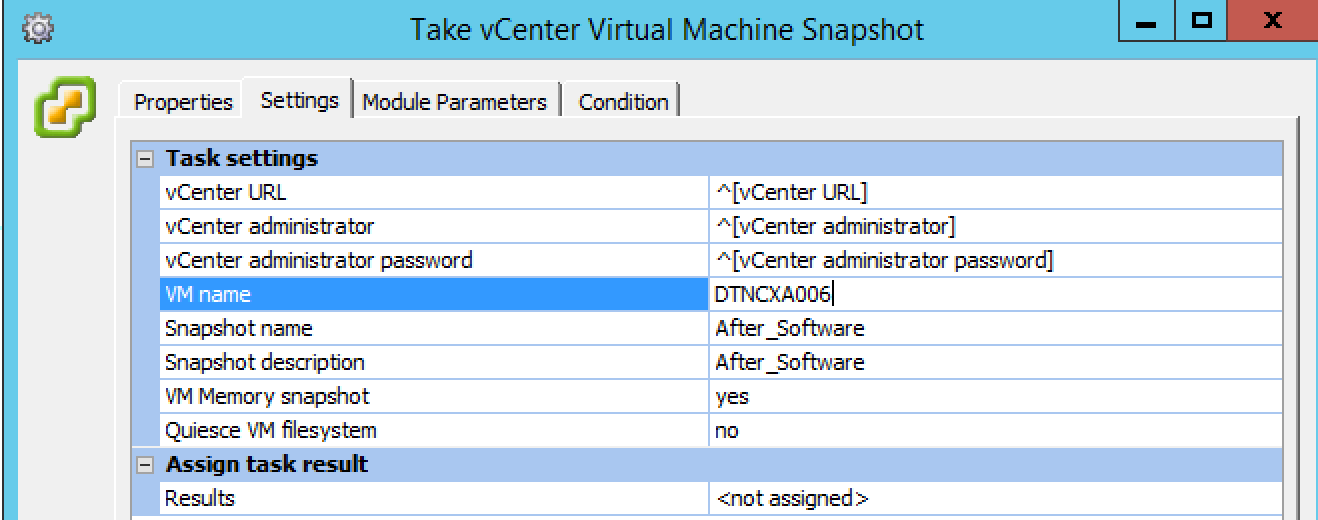
Add the snapshot task to a Project named 02.00.03 After Software Snapshot
Repeat Install WSUS Patches (Recursive)
We already run this project but you can add it again to make sure the latest office patches are also included.
This project will install the Windows Updates from the internet or your WSUS server. The project is created by Virtual Engine’s WSUS Integration Management Pack (WiMP) and you can download it here. A great thing about this project is that it will keep repeating itself until all patches are installed.

For the deployment Runbook I copied the project that the WSUS integration pack from Virtual Engine made and added an extra reboot and extra scan.
Add to Deployment Run book
Now add the projects to the deployment Run book. Make sure that all the software projects use the RunBookWho parameter except the Snapshot project that needs to be run on an agent with PowerCLI installed. In this guide this is the DTNMGT01.

I hope this was informative. Part 3 will be up in a few weeks. For questions or comments you can always give a reaction in the comment section or contact me:

Hi great article.
Do you have the wsus download updates pack somewhere? The url don’t work 🙁